Rails6プロジェクトの各種初期設定
移行ガイド
・Ruby on Rails 6.xから7.0.xへアップグレード
目次
0. Yarnのインストール
1. プロジェクトの生成
2. データベースの設定
3. ユーザー/データベースの生成
4. モデル/コントローラー/ビューの生成
5. マイグレーション
6. Slimの導入、erbからslimファイルへ変換
7. Bootstrapの導入 ※CSSのみ
8. Bootstrap + jQueryの導入
9. 日本語、タイムゾーン、ホストの設定
10. 開発環境ではHTMLの改行、空白の削除を行わない
11. ransack(検索機能)の導入
12. kaminari(ページネーション)の導入
13. Productionモードの起動/設定
14. 本番環境でのrailsファイルのパーミッション
15. 本番環境のUnicorn/Pumaサーバーの設定
16. プロジェクトをオープンソースで公開する
--- 以下はRails開発に役立つミニ情報。
17. ルーティングの名前(xxx_path)
18. scaffold(スキャフォールド)
19. デバッグ(logger.debug)
20. JavaScriptの追加
21. ホストのエラー
22. フロントエンド
0. Yarnのインストール
Rails6はYarnを必要としますので、最初にインストールを行います。
1. プロジェクトの生成
次の例ではmyappプロジェクトを生成します。データベースは「MySQL」(MariaDB)を使用。Turbolinks、Action Mailer、Action Mailbox、Action Storage、テストは未使用です。
cd ~/
mkdir myapp
cd myapp

rails new . --skip-turbolinks --skip-action-mailer --skip-action-mailbox --skip-active-storage --skip-test -d mysql
newコマンドの引数の意味。
| --skip-turbolinks | Turbolinksを利用しない |
| --skip-action-mailer | Action Mailerを利用しない |
| --skip-action-mailbox | Action Mailboxを利用しない |
| --skip-active-storage | Action Storageを利用しない |
| --skip-test | テスト関連のファイルを作成しない |
| -d | データベースを指定する ※mysql/postgresql/sqlite3/oracleなど |
ReactまたはVue.jsを利用する場合は以下を追記する。
| --webpack=react | Reactを利用する |
| --webpack=vue | Vue.jsを利用する |
その他のnewコマンドの詳細は--helpで確認可能です。
rails new --help
2. データベースの設定
開発用(development)、本番用(production)の「database、username、password」を設定する。必要があればテスト用(test)も設定する。
[config/database.yml]
development:
  <<: *default
  database: myapp_development
  username: myapp_development
  password: 1234567890
この例ではデータベース名とユーザー名を同一にしています。Gitなどのリポジトリを利用しない及びセキュリティ的に問題ないと判断できる場合は、productionのパスワードも環境変数を経由しなくて「ベタ書き」でも良いかも知れません。
データベースの設定以外にも「socket」は本番と開発環境で異なる場合がありますので注意して下さい。
次のコマンドで確認可能です。
mysql_config --socket
[例]
| 本番用 | socket: /var/lib/mysql/mysql.sock |
|---|---|
| 開発用 | socket: /var/run/mysqld/mysqld.sock |
3. ユーザー/データベースの生成
// MySQL(MariaDB)にログインする
mysql -u root -p
// ユーザーの作成
CREATE USER 'ユーザー名' IDENTIFIED BY 'パスワード';
// データベースの作成 ※注意。下記参照。
CREATE DATABASE myapp_development;
// ユーザーにデータベース(myapp_development)の権限を付与する
GRANT ALL PRIVILEGES ON myapp_development.* TO 'ユーザー名';

// --- 関連するコマンド
// データベースの一覧
SHOW DATABASES;
// テーブルの一覧
SHOW TABLES;
// ユーザーの一覧を表示する
SELECT host, user, password FROM mysql.user;
// ユーザーの削除
DROP USER ユーザー名;
// データベースの権限を取り消す
REVOKE ALL ON データベース名.* FROM ユーザー名
// データベースの削除
DROP DATABASE データベース名;
Rails6以降はMySQL 5.5.8(MariaDB 10.2.2)以上が推奨です。
デフォルト文字コードは「utf8mb4」(1文字4バイト換算)となりました。上述したバージョン未満の場合はstring型は255文字ですので、そのままだとインデックスを貼るときに767バイト制限のエラーが発生します。
バージョンを上げずに対処するには、次のように文字コードを「UTF8」(1文字3バイト換算)と指定します。
// データベース(UTF8)の作成
CREATE DATABASE myapp_development CHARACTER SET utf8;
その際は「config/database.yml」のencodingを「utf8」に変更します。
4. モデル/コントローラー/ビューの生成
// モデルの作成(モデル/マイグレーションファイルの生成)
bin/rails g model Cat name:string description:text sort:integer

// マイグレーションの実行(テーブルの生成)
bin/rails db:migrate
※catsテーブルが生成される

// コントローラー/ビューの作成(ファイルの生成)
bin/rails g controller cats index show new edit

// Pumaサーバの起動
bin/rails s
※ブラウザでhttp://localhost:3000/cats/indexにアクセスする
※ルーター(URL)の設定はconfig/routes.rbで設定する
5. マイグレーション
// マイグレーションファイルの生成
bin/rails g migration 任意の名称
// マイグレーションの実行(最新まで適用)
bin/rails db:migrate
※各テーブルの最終的な構成はdb/schema.rbで確認可能。
6. Slimの導入、erbからslimファイルへ変換
// Gemfileに以下を追加してbundleする
gem 'slim-rails'
gem 'html2slim'

// erbからslimへ変換
bundle exec erb2slim app/views/layouts/
bundle exec erb2slim app/views/cats/
※*.erbファイルが残りますので手動で削除します。
7. Bootstrapの導入 ※CSSのみ
// Gemfileに以下を追加してbundleする
gem 'bootstrap', '4.6.1'

// 手動で削除
app/assets/stylesheets/application.css
// 手動で作成
app/assets/stylesheets/application.scss

application.scssに次のコードをコピペする
/*
 * This is a manifest file that'll be compiled into application.css, which will include all the files
 * listed below.
 *
 * Any CSS and SCSS file within this directory, lib/assets/stylesheets, or any plugin's
 * vendor/assets/stylesheets directory can be referenced here using a relative path.
 *
 * You're free to add application-wide styles to this file and they'll appear at the bottom of the
 * compiled file so the styles you add here take precedence over styles defined in any other CSS/SCSS
 * files in this directory. Styles in this file should be added after the last require_* statement.
 * It is generally better to create a new file per style scope.
 *
 *= require_tree .
 *= require_self
 */

@import "bootstrap"
8. Bootstrap + jQueryの導入
8-1. インストール
次のyarnコマンドでインストールする。
yarn add jquery popper.js bootstrap
※popper.jsはbootstrapが使用するので必要です。
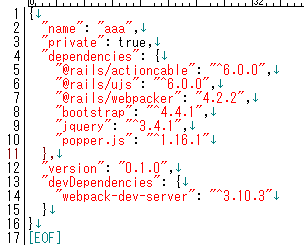
インストールされたバージョンなどはpackage.jsonで確認可能です。
8-2. ファイルの設定
application.cssを削除してapplication.scssを作成します。
[app/assets/stylesheets/application.scss]
/*
 * This is a manifest file that'll be compiled into application.css, which will include all the files
 * listed below.
 *
 * Any CSS and SCSS file within this directory, lib/assets/stylesheets, or any plugin's
 * vendor/assets/stylesheets directory can be referenced here using a relative path.
 *
 * You're free to add application-wide styles to this file and they'll appear at the bottom of the
 * compiled file so the styles you add here take precedence over styles defined in any other CSS/SCSS
 * files in this directory. Styles in this file should be added after the last require_* statement.
 * It is generally better to create a new file per style scope.
 *
 *= require_tree .
 *= require_self
 */


// 次はどちらでも良い
//@import "bootstrap/scss/bootstrap";
@import  '../../../node_modules/bootstrap/scss/bootstrap.scss';
[app/javascript/packs/application.js]
// This file is automatically compiled by Webpack, along with any other files
// present in this directory. You're encouraged to place your actual application logic in
// a relevant structure within app/javascript and only use these pack files to reference
// that code so it'll be compiled.

require("@rails/ujs").start()
require("channels")

// 以下はどれでもでも良い
// require("bootstrap")
// require("bootstrap/dist/js/bootstrap")
import 'bootstrap';

// Uncomment to copy all static images under ../images to the output folder and reference
// them with the image_pack_tag helper in views (e.g <%= image_pack_tag 'rails.png' %>)
// or the `imagePath` JavaScript helper below.
//
// const images = require.context('../images', true)
// const imagePath = (name) => images(name, true)
[config/webpack/environment.js]
const { environment } = require('@rails/webpacker')

/*
  const webpack = require('webpack')
  environment.plugins.prepend('Provide',
    new webpack.ProvidePlugin({
      $: 'jquery/src/jquery',
      jQuery: 'jquery/src/jquery',
      Popper: ['popper.js', 'default']
    })
  )
*/

// エイリアスの設定をする
environment.toWebpackConfig().merge({
  resolve: {
      alias: {
               'jquery': 'jquery/src/jquery'
             }
           }
});

module.exports = environment
ネットだと上記のコメント部分が必要と書いてあるが、最新のWebpacker4.2.2、bootstrap4.4.1、jQuery3.4.1、Popper.js1.16.1だと必要がないみたいです。 ※動作しない場合はコメントを解除して下さい。
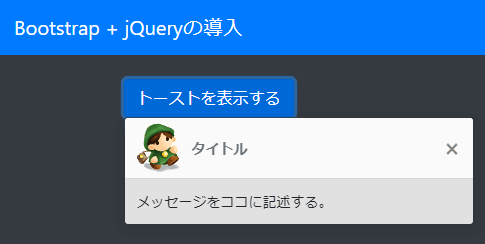
8-3. 動作確認
jquery.jsとbootstrap.jsが正常に動作しているかを確認する為に、各自のビューに次のコードを記述します。コードの内容はボタンを押下するとトーストが表示されます。
<script>
$(window).on('load', function() {
$('body').addClass('bg-dark');
});
</script>
<br>
<button type="button" class="btn btn-primary" onclick="$('.toast').toast('show')">トーストを表示する</button>
<div class="toast" data-delay="3000" role="alert" aria-live="assertive" aria-atomic="true">
<div class="toast-header">
<img src="https://www.petitmonte.com/images/manabu.gif" class="mr-2" alt="">
<strong class="mr-auto">タイトル</strong>
<button type="button" class="ml-2 mb-1 close" data-dismiss="toast" aria-label="Close">
<span aria-hidden="true">×</span>
</button>
</div>
<div class="toast-body">
メッセージをココに記述する。
</div>
</div>
実行結果
9. 日本語、タイムゾーン、ホストの設定
// 次のja.ymlファイルをconfig/locales/ja.ymlに設置する
https://github.com/svenfuchs/rails-i18n/blob/master/rails/locale/ja.yml

// config/application.rbに次のコードを追記する
class Application < Rails::Application
  ・・・省略 ・・・

  config.time_zone = 'Asia/Tokyo'
  config.i18n.default_locale = :ja

  # 自分のホスト名を入力してください。
  config.hosts << "www.petitmonte.com"
end
10. 開発環境ではHTMLの改行、空白の削除を行わない
// config/environments/development.rbに次の行を追記します。
Slim::Engine.options[:pretty] = true
11. ransack(検索機能)の導入
[ransackの使用例]
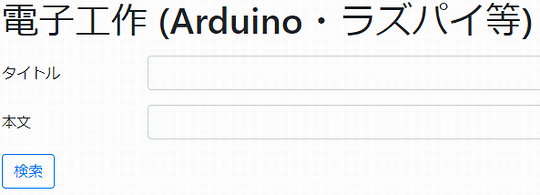
[ransackの導入]
// Gemfileに以下を追加してbundleする
gem 'ransack'
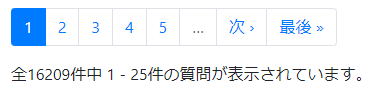
12. kaminari(ページネーション)の導入
[kaminariの使用例]
[kaminariの導入]
// Gemfileに以下を追加してbundleする
gem 'kaminari'

// デザインをBootstrap4にする
bin/rails g kaminari:views bootstrap4
[config/locales/kaminari.ja.yml] ※日本語対応ファイル
ja:
  views:
    pagination:
      first: "« 最初"
      last: "最後 »"
      previous: "‹ 前"
      next: "次 ›"
      truncate: "…"
  helpers:
    page_entries_info:
      one_page:
        display_entries:
          zero: "%{entry_name}がありません。"
          one: "1件の%{entry_name}が表示されています。"
          other: "%{count}件の%{entry_name}が表示されています。"
      more_pages:
        display_entries: "全%{total}件中 %{first} - %{last}件の%{entry_name}が表示されています。"
(参考元)現場で使える Ruby on Rails 5速習実践ガイド
※その他の日本語形式は「kaminari.ja.yml」をネットで検索。
[kaminariのコード例]
// コントローラー
@q = User.all.order(updated_at: "DESC").ransack(params[:q])
@cats = @q.result(distinct: true).page(params[:page]).per(25)

// ビュー
.mb-3
  = paginate @cats
  = page_entries_info @cats

- @cats.each_with_index do |cat, i|
  p = cat.name
13. Productionモードの起動/設定
13-1. Productionモードで起動する
bin/rails s -e production
13-2. セキュアCookieを使用する
これは本番環境がhttps(SSL/TLS)の場合のみです。
[config/environments/production.rb]
config.force_ssl = true
13-3. ログの出力レベルを警告以上にする
[config/environments/production.rb]
config.log_level = :warn
Railsのログファイルはlog/production.logです。デフォルトの「:debug」だと全てのログが記録されます。1日30,000PVだと70MBぐらい、1か月で2.1GB、1年で25.2GBのファイルサイズになります。警告以上推奨。
13-4. CSSファイルを圧縮する
[environments/development.rb]
config.assets.css_compressor = :sass
13-5. CSS/JSファイルをプリコンパイルする
実行前にpublic/assets、public/packsを丸ごと削除する。
bin/rails assets:precompile
13-6. publicのファイルにアクセスできるようにする
[config/environments/production.rb]
config.action_controller.asset_host = 'http://www.example.com'
config.public_file_server.enabled = true
13-7. デプロイ前にログを削除する
log/development.log / production.logファイルの内容を空にする。
13-8. デプロイ前にキャッシュ(tmp/cache)を削除する
bin/rails tmp:clear
14. 本番環境でのrailsファイルのパーミッション
bin/railsファイルに実行権限(X)を付与する。
15. 本番環境のUnicorn/Pumaサーバーの設定
次の記事を参照。
| Nginx/Unicorn/Ruby on Railsの本番環境構築/デプロイ |
| Nginx + Unicornで複数のRailsプロジェクトを実行する |
| Nginx + Pumaで複数のRailsプロジェクトを実行する |
| Railsアプリを最小メモリで起動する |
| Puma/Unicornのメモリ大量消費を回避する [Ruby + jemalloc] |
16. プロジェクトをオープンソースで公開する
プロジェクトをオープンソースで公開する際のゴミ削除や設定です。
// config/environments/development.rb
// config/environments/production.rb
config.require_master_key = true

// config/environments/production.rb
config.log_level = :warn

// データベースのパスワード漏洩に注意
config/database.yml

// コマンド
bin/rails tmp:clear

// ソース内
logger.debugの削除

// ゴミを削除
/db/schema.rbの削除
/config/master.keyの削除
/config/credentials.yml.encの削除
public/packs、public/assetsの削除
Gemfile.lockの削除
node_modules、yarn.lockの削除
README.mdの削除
log/development.log/production.logを空にする
マスタキー(master.key/credentials.yml.enc)の再生成、Webpackerのインストール、app/assetsにimagesフォルダを手動で生成するなど詳細は青色申告決算書&仕訳帳システムの「3. インストール方法」をご覧ください。
以下はRails開発に役立つミニ情報です。
17. ルーティングの名前(xxx_path)
次のコマンドを使用して確認する。xxxの末尾に_pathを付加すればOK。
rake routes
また、config/routes.rbで次のコードは
resources :clients
このように展開できます。
get     '/clients',          to: 'clients#index',   as: 'clients'
post    '/clients',          to: 'clients#create'
get     '/clients/new',      to: 'clients#new',     as: 'new_client'
get     '/clients/:id/edit', to: 'clients#edit',    as: 'edit_client'
get     '/clients/:id',      to: 'clients#show',    as: 'client'
patch   '/clients/:id',      to: 'clients#update'
put     '/clients/:id',      to: 'clients#update'
delete  '/clients/:id',      to: 'clients#destroy'
18. scaffold(スキャフォールド)
モデル、ビュー、コントローラーの自動生成。足場。テンプレート。
bin/rails g scaffold モデル名 name:string description:text sort:integer
19. デバッグ(logger.debug)
logger.debug("文字列の出力")
logger.debug(変数)
logger.debug(オブジェクト)
20. JavaScriptの追加
app/javascriptにflash.jsファイルを追加した場合は次のようにする。
[app/javascript/packs/application.js]
// This file is automatically compiled by Webpack, along with any other files
// present in this directory. You're encouraged to place your actual application logic in
// a relevant structure within app/javascript and only use these pack files to reference
// that code so it'll be compiled.

require("@rails/ujs").start()
require("channels")

// 追加分
require("flash")
rails newでプロジェクトを生成するとデフォルトでTurboLinksが有効となります。その場合はTurboLinks専用のイベントなどを使用して下さい。
※1章のプロジェクトの生成ではTurboLinksを利用しない設定です。
21. ホストのエラー
次のようなエラーが発生する場合
[config/application.rb]
module MyApp
  class Application < Rails::Application

    ・・・

    config.hosts << "www.petitmonte.com"
    ・・・


  end
end
のようにすればOKです。
21. フロントエンド
[Vue.js]
Rails6にVue.jsを導入する
RailsでVue.jsの開発を行う
Vue.jsをIE11に対応させる
Vuexの使い方
Vue Routerの使い方
Rails + Vue.js + AjaxでCRUDのサンプルプロジェクト
[React]
Rails6にReactを導入する
ReactをIE9/10/11に対応させる
Rails + React + AjaxでCRUDのサンプルプロジェクト
関連記事
| 前の記事: | Rails6のプロジェクト作成時の「RAILS_ENV=development environment is not defined in config/webpacker.yml, falling back to production environment」のエラー対策 |
| 次の記事: | ログイン機能をつくる [Ruby on Rails] |

プチモンテ ※この記事を書いた人
 | |
| 💻 ITスキル・経験 サーバー構築からWebアプリケーション開発。IoTをはじめとする電子工作、ロボット、人工知能やスマホ/OSアプリまで分野問わず経験。 画像処理/音声処理/アニメーション、3Dゲーム、会計ソフト、PDF作成/編集、逆アセンブラ、EXE/DLLファイルの書き換えなどのアプリを公開。詳しくは自己紹介へ |
| 🎵 音楽制作 BGMは楽器(音源)さえあれば、何でも制作可能。歌モノは主にロック、バラード、ポップスを制作。歌詞は抒情詩、抒情的な楽曲が多い。楽曲制作は🔰2023年12月中旬 ~ | |