Nginx/Unicorn/Ruby on Railsの本番環境構築/デプロイ [CentOS]
CentOS6/7に「Nginx」(Webサーバー)、「Unicorn」(アプリケーションサーバー)、「PostgreSQL」(データベース)の環境を構築して「Ruby on Rails」のプロジェクトをデプロイ(Web上に公開)する方法です。
この記事のVPS(仮想専用サーバ)ではConoHaを利用していますが、さくらのVPS、AWSなどでも同じように構築できると思います。OS以外、新規にインストールしますが「初心者」でもOKです。
実行例
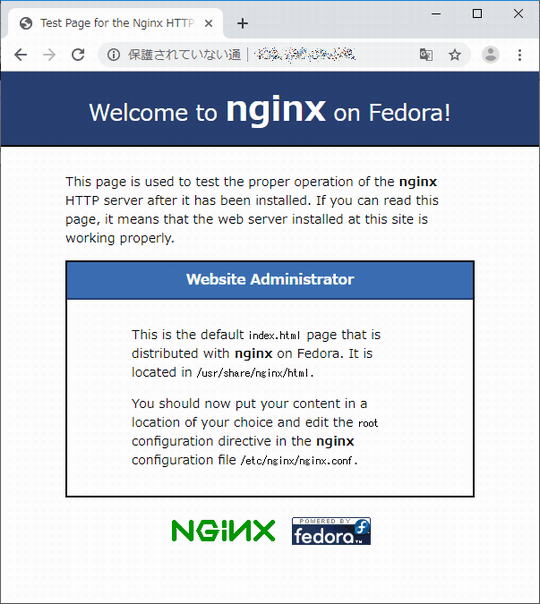
Nginxのインストール直後は/usr/share/nginx/html/index.htmlを表示。

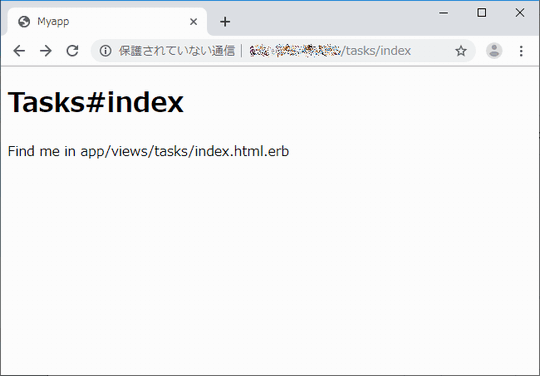
最終的にはRailsプロジェクトを表示します。

目次
1. 契約/サービスお申込み
2. 一般ユーザーを追加/sudoを設定する
3. テキストエディタviの使い方
4. 一般ユーザーで公開鍵認証 (rootログイン禁止/パスワードログイン禁止)
5. SSHポート変更 &ファイアウォールの設定(firewalld)
6. SFTPの設定(WinSCP)
7. git/rbenv/Ruby/Railsのインストール
8. PostgreSQLのインストール
9. Nginxのインストール
10. Railsプロジェクトの作成
11. unicorn.rbを作成する
12. Unicornの起動/停止スクリプトを作成する (CentOS6)
13. /myapp/lib/tasks/unicorn.rakeを編集する (CentOS6)
14. /myapp/publicにindex.htmlを作成する
15. Nginxの設定ファイル(nginx.conf)の編集
16. myapp.confを作成する
17. Nginx、Unicornを手動で起動/停止
18. Nginxの自動起動
19. Unicornの自動起動
20. 自動起動の確認
21. イメージの保存
以下、解説がない章は参考URLを見て下さい。 ※ConoHaの公式サイト。
1. 契約/サービスお申込み
ConoHaのVPSサービスに申し込みます。
| 1 | サービスを選択(最初は1GBメモリ推奨。後でスケールアップ/ダウン可能) |
| 2 | イメージタイプは[OS]タブの「CentOS」の7.6を選択 |
| 3 | rootパスワードを入力 |
| 4 | [オプションを見る][スタートアップスクリプト][テンプレート]の「Fail2banインストール」を選択 |
| 5 | 追加ボタンを押せばサーバーが作成されます。 |
※Fail2banはブルートフォース攻撃(総当たり攻撃)の対策です。
2. 一般ユーザーを追加/sudoを設定する
3. テキストエディタviの使い方
これだけ使えればOKです。
| i | 編集モードの開始 ※「i」は小文字のアイ。 |
| ESC | 編集モードの終了 |
| Back Space | 編集モードで1文字の削除 ※Deleteは不可 |
| /検索文字 + Enter | 閲覧モードで文字列を検索可能 |
| :wq + Enter | 保存して終了 |
| :q! + Enter | 保存せずに終了 ※「!」はビックリマーク。 |
4. 一般ユーザーで公開鍵認証 (rootログイン禁止/パスワードログイン禁止)
一般ユーザーで公開鍵認証を使用してSSHログインする (ConoHa)
※ユーザー名、秘密鍵のパスフレーズ、秘密鍵でのログインとなります。
5. SSHポート変更 &ファイアウォールの設定(firewalld)
firewalldによる各ポートの制御でセキュリティを高めます。
// 状態を確認
sudo firewall-cmd --list-all

// sshd_configの編集
sudo vi /etc/ssh/sshd_config
# Port 22の下に
Port 1022
を追加する

// sshdの再起動
sudo systemctl restart sshd

// firewalldからSSHを削除
sudo firewall-cmd --permanent --remove-service=ssh

// ssh.xmlをコピー
sudo cp /usr/lib/firewalld/services/ssh.xml /etc/firewalld/services/ssh-1022.xml

// ssh-1022.xmlの編集
sudo vi /etc/firewalld/services/ssh-1022.xml
※port="22"をport="1022"に変更する

// firewalldにssh-1022を追加する
sudo firewall-cmd --permanent --add-service=ssh-1022

// firewallの再起動
sudo firewall-cmd --reload

// 状態を確認
sudo firewall-cmd --list-all

// firewalldにhttp/httpsを追加する
sudo firewall-cmd --permanent --add-service=http
sudo firewall-cmd --permanent --add-service=https

// firewallの再起動
sudo firewall-cmd --reload

// 状態を確認
sudo firewall-cmd --list-all
6. SFTPの設定(WinSCP)
7. git/rbenv/Ruby/Railsのインストール
// gitインストール
sudo yum install git
git --version

// rbenv
git clone https://github.com/rbenv/rbenv.git ~/.rbenv

echo 'export PATH="$HOME/.rbenv/bin:$PATH"' >> ~/.bashrc
echo 'eval "$(rbenv init -)"' >> ~/.bashrc

source ~/.bashrc

git clone https://github.com/rbenv/ruby-build.git "$(rbenv root)"/plugins/ruby-build

rbenv -v

sudo yum -y install autoconf bison

sudo yum -y install bzip2 gcc openssl-devel readline-devel zlib-devel

// ruby
rbenv install 2.5.1

rbenv global 2.5.1

ruby -v

which ruby

// RubyGems
gem update --system

gem -v

gem list

// Bundler
gem install bundler

// Rails
gem install rails -v 5.2.1

rails -v

// Node.js
curl -sL https://rpm.nodesource.com/setup_10.x | sudo bash -
sudo yum install nodejs

node -v
8. PostgreSQLのインストール
// PostgreSQL
sudo yum -y install https://download.postgresql.org/pub/repos/yum/reporpms/EL-7-x86_64/pgdg-redhat-repo-latest.noarch.rpm
sudo yum -y install postgresql11-server

psql -V

// データベースクラスタの作成 (UTF8/ロケールなし)
// 詳細:https://qiita.com/tom-sato/items/e1903cb974fb6c6d5664
sudo PGSETUP_INITDB_OPTIONS="-E UTF8 --locale=C" /usr/pgsql-11/bin/postgresql-11-setup initdb

// データベースサーバの起動
sudo systemctl start postgresql-11.service

// ユーザーを作成する ※ユーザー名はCentOSの一般ユーザー名と同名。
sudo su postgres -c 'createuser -s ユーザー名'

// 動作確認、qで終了
psql postgres

// OS起動時にPostgreSQLが起動されるようにする
sudo systemctl enable postgresql-11.service

// PostgreSQLの開発パッケージ
sudo yum install postgresql-devel
[PostgreSQLのコマンド]
| \l | データベースの一覧 |
| \c | データベースの選択 |
| \dt; | テーブル一覧 |
| \d | テーブル名 ※テーブルの構造 |
| SELECT * FROM pg_shadow; ユーザ毎のパスワード有無の確認 ※あればハッシュ化されている | |
※「\」は「¥」です。
9. Nginxのインストール
// Nginx
sudo yum install -y nginx
// バージョン
nginx -v

// Nginxの起動
sudo nginx
// Nginxの停止
sudo nginx -s stop
10. Railsプロジェクトの作成
// Railsプロジェクト
cd ~/
mkdir myapp
cd myapp
rails new . -d postgresql

※/home/ユーザー名/myappにプロジェクトが生成される

// データベースの生成
bin/rails db:create

// モデルの作成(モデル/マイグレーションファイルの生成)
bin/rails g model Task name:string description:text

// マイグレーションの実行(テーブルの生成)
bin/rails db:migrate

// コントローラーの作成(コントローラー/ビューの生成)
bin/rails g controller tasks index show new edit

// Gemfileファイルの編集
vi /home/ユーザー名/myapp/Gemfile
※/home/ユーザー名/myapp/Gemfileの末尾を次のようにする

#gem 'tzinfo-data', platforms: [:mingw, :mswin, :x64_mingw, :jruby]
gem 'unicorn'

// Gemfileファイルを元に各Gemをインストール
bundle
11. unicorn.rbを作成する
/home/ユーザー名/myapp/config/unicorn.rbを作成する
vi /home/ユーザー名/myapp/config/unicorn.rb
[unicorn.rb]
worker_processes Integer(ENV["WEB_CONCURRENCY"] || 4)
timeout 15
preload_app true

listen '/home/ユーザー名/myapp/tmp/unicorn.sock'
pid    '/home/ユーザー名/myapp/tmp/unicorn.pid'

before_fork do |server, worker|
  Signal.trap 'TERM' do
    puts 'Unicorn master intercepting TERM and sending myself QUIT instead'
    Process.kill 'QUIT', Process.pid
  end

  defined?(ActiveRecord::Base) and
    ActiveRecord::Base.connection.disconnect!
end

after_fork do |server, worker|
  Signal.trap 'TERM' do
    puts 'Unicorn worker intercepting TERM and doing nothing. Wait for master to send QUIT'
  end

  defined?(ActiveRecord::Base) and
    ActiveRecord::Base.establish_connection
end

stderr_path File.expand_path('log/unicorn.log', ENV['RAILS_ROOT'])
stdout_path File.expand_path('log/unicorn.log', ENV['RAILS_ROOT'])
Deploying Rails Applications with Unicorn (Heroku)
12. Unicornの起動/停止スクリプトを作成する
これはCentOS6以下用です、CentOS7以上は飛ばしてください。
cd /home/ユーザー名/myapp
rails g task unicorn
13. /home/ユーザー名/myapp/lib/tasks/unicorn.rakeを編集する
これはCentOS6以下用です、CentOS7以上は飛ばしてください。
[unicorn.rake]
namespace :unicorn do

  # Tasks
  desc "Start unicorn"
  task(:start) {
    config = Rails.root.join('config', 'unicorn.rb')
    sh "unicorn -c #{config} -E development -D"
  }

  desc "Stop unicorn"
  task(:stop) {
    unicorn_signal :QUIT
  }

  desc "Restart unicorn with USR2"
  task(:restart) {
    unicorn_signal :USR2
  }

  desc "Increment number of worker processes"
  task(:increment) {
    unicorn_signal :TTIN
  }

  desc "Decrement number of worker processes"
  task(:decrement) {
    unicorn_signal :TTOU
  }

  desc "Unicorn pstree (depends on pstree command)"
  task(:pstree) do
    sh "pstree '#{unicorn_pid}'"
  end

  # Helpers
  def unicorn_signal signal
    Process.kill signal, unicorn_pid
  end

  def unicorn_pid
    begin
      File.read("/home/ユーザー名/myapp/tmp/unicorn.pid").to_i
    rescue Errno::ENOENT
      raise "Unicorn does not seem to be running"
    end
  end
end
「development」は最終的リリース(デプロイ)では「production」に変更してください。
※モデル(Task)/コントローラー(tasks)の名称は無関係です。
14. /home/ユーザー名/myapp/publicにindex.htmlを作成する
<!DOCTYPE html>
<html>
<head>
<meta charset="UTF-8">
<title>Hello!</title>
</head>
<body>
  index.htmlが表示されました。<br>
  <br>
  <a href="./tasks/index">Tasks#index</a>
</body>
</html>
15. Nginxの設定ファイル(nginx.conf)の編集
最初にnginx.confをローカルなどにバックアップして下さい。
sudo vi /etc/nginx/nginx.conf
[nginx.conf]
user ユーザー名;

worker_processes auto;

events {
    worker_connections  1024;
}

http {
    server_tokens off;

    include       /etc/nginx/mime.types;
    default_type  application/octet-stream;

    access_log  /var/log/nginx/access.log;
    error_log   /var/log/nginx/error.log;

    sendfile        on;
    #tcp_nopush     on;

    #keepalive_timeout  0;
    keepalive_timeout  65;

    #gzip  on;

    include /etc/nginx/conf.d/*.conf;
}
※/*.confからコメントの緑色になっていますが、全て必要です。
16. myapp.confを作成する
sudo vi /etc/nginx/conf.d/myapp.conf
[myapp.conf]
upstream unicorn {
    server  unix:/home/ユーザー名/myapp/tmp/unicorn.sock;
}

server {
    listen       80;
    server_name  サーバーのIPアドレス;

    root /home/ユーザー名/myapp/public;

    client_max_body_size 100m;
    error_page  404              /404.html;
    error_page  500 502 503 504  /500.html;
    try_files   $uri/index.html $uri @unicorn;

    location @unicorn {
        proxy_set_header X-Real-IP $remote_addr;
        proxy_set_header X-Forwarded-For $proxy_add_x_forwarded_for;
        proxy_set_header X-Forwarded-Proto $scheme;
        proxy_set_header Host $http_host;
        proxy_pass http://unicorn;
    }
}
17. Nginx、Unicornを手動で起動/停止
// Nginxの停止
sudo nginx -s stop
// Nginxの起動
sudo nginx

// ユニコーンの起動確認
ps -ef | grep unicorn | grep -v grep

// これ以下はCentOS6以下が対象です。CentOS7以上は19章を参照。

// ユニコーンの起動
cd /home/ユーザー名/myapp
bundle exec rake unicorn:start
※エラーが表示されて起動しない場合は、myapp/log/unicorn.logを確認する

// ユニコーンの停止
cd /home/ユーザー名/myapp
bundle exec rake unicorn:stop
ココで次のURLでアクセスできるはずです。
| http://IPアドレス/ |
| http://IPアドレス/tasks/index |
18. Nginxの自動起動
// 自動起動の設定
sudo systemctl enable nginx

// 設定後にNginxを操作する場合は、次のコマンドで開始、停止、リスタート
sudo systemctl start nginx
sudo systemctl stop nginx
sudo systemctl restart nginx

// うまく行かない場合は、最初に次のコマンドで停止してから行う
sudo nginx -s stop
19. Unicornの自動起動
サービスファイルの作成と自動起動設定です。
CentOS7以上用 (systemctl)
unicorn_sample_app.serviceのファイルを作成する。
sudo vi /usr/lib/systemd/system/unicorn_sample_app.service
[unicorn_sample_app.service]
[Unit]
Description=Rails sample app service.
After=network.target

[Service]
# ユーザー名
User=ユーザー名

# 環境
Environment=RAILS_ENV=production

# プロジェクトパス
WorkingDirectory=/home/ユーザー名/myapp

# PID
PIDFile=/home/ユーザー名/myapp/tmp/unicorn.pid

# 実行
ExecStart=/home/ユーザー名/.rbenv/shims/bundle exec unicorn -c /home/ユーザー名/myapp/config/unicorn.rb

# 落ちた場合は自動で再起動 ※systemctl stopは除く
Restart=always

[Install]
WantedBy=multi-user.target
ExecStartの「/home/ユーザー名/.rbenv/shims/bundle」のパスは「which bundle」のコマンドで表示されるパスを設定します
// デーモンリロード
sudo systemctl daemon-reload

// 自動起動の設定(On)
sudo systemctl enable unicorn_sample_app

// 自動起動の設定(Off)
sudo systemctl disable unicorn_sample_app

// サービスの開始
sudo systemctl start unicorn_sample_app

// サービスの停止
sudo systemctl stop unicorn_sample_app

// サービスの状態
sudo systemctl status unicorn_sample_app

// サービスのリスタート
sudo systemctl restart unicorn_sample_app

// サービスの一覧情報
sudo systemctl list-unit-files
CentOS6以下用 (chkconfig)
unicornのファイルを作成する。
sudo vi /etc/init.d/unicorn
[unicorn]
#!/bin/bash

#chkconfig:2345 85 70
#description:unicorn shell

USER='ユーザー名'
RAILS_ROOT='/home/ユーザー名/myapp'
NAME='Unicorn'
PID="${RAILS_ROOT}/tmp/unicorn.pid"

start()
{
  if [ -e $PID ]; then
    PID_NUM=`cat ${PID}`
    PROCESS=`ps ho pid p ${PID_NUM} > /dev/null; echo $?`
    if [ "${PROCESS}" != 0 ]; then
      echo 'rm ghost pid'
      rm -f ${PID}
    else
      echo "$NAME already started"
      exit 1
    fi
  fi
  echo "start $NAME"
  su - $USER -lc "cd ${RAILS_ROOT} && bundle exec rake unicorn:start"
}

stop()
{
  if [ ! -e $PID ]; then
    echo "$NAME not started"
    exit 1
  fi
  echo "stop $NAME"
  su - $USER -lc "cd ${RAILS_ROOT} && bundle exec rake unicorn:stop"
}

force_stop()
{
  if [ ! -e $PID ]; then
    echo "$NAME not started"
    exit 1
  fi
  echo "stop $NAME"
  kill -INT `cat ${PID}`

}

reload()
{
  if [ ! -e $PID ]; then
    echo "$NAME not started"
    start
    exit 0
  fi
  echo "reload $NAME"
  #kill -HUP `cat ${PID}`
  su - $USER -lc "cd ${RAILS_ROOT} && bundle exec rake unicorn:reload"
}

restart()
{
    stop
    sleep 3
    start
}

case "$1" in
  start)
    start
    ;;
  stop)
    stop
    ;;
  force-stop)
    force_stop
    ;;
  reload)
    reload
    ;;
  restart)
    restart
    ;;
  *)
    echo "Syntax Error: release [start|stop|force-stop|reload|restart]"
    ;;
esac
// パーミッションの変更
sudo chmod 755 /etc/init.d/unicorn

// サービスの自動起動設定
sudo chkconfig unicorn on

// サービスの設定リスト
chkconfig --list
CentOS7 + unicorn + nginx 設定メモ (Qiita)
20. 自動起動の確認
OSを再起動してサービスが自動起動されるか確認する。
sudo reboot
21. イメージの保存
ConoHaでは今回作成したイメージを丸ごと保存可能です。保存したイメージから新規にVPSサーバを作成することも可能です。詳細は公式サイトで確認してください。
プログラムの流れ
Nginx -> Unicorn -> Rails -> Unicorn -> Nginx
アプリケーションサーバー
UnicornをPumaに変更する場合はNginx + Pumaで複数のRailsプロジェクトを実行するを参考にして下さい。
最後に
長時間、お疲れさまでした。
Nginx、Railsのセキュリティ強化などは各自で検索して対応して下さい。
参考書
現場で使える Ruby on Rails 5速習実践ガイド
関連記事
プチモンテ ※この記事を書いた人
 | |
 | 💻 ITスキル・経験 サーバー構築からWebアプリケーション開発。IoTをはじめとする電子工作、ロボット、人工知能やスマホ/OSアプリまで分野問わず経験。 画像処理/音声処理/アニメーション、3Dゲーム、会計ソフト、PDF作成/編集、逆アセンブラ、EXE/DLLファイルの書き換えなどのアプリを公開。詳しくは自己紹介へ |
| 🎵 音楽制作 BGMは楽器(音源)さえあれば、何でも制作可能。歌モノは主にロック、バラード、ポップスを制作。歌詞は抒情詩、抒情的な楽曲が多い。楽曲制作は🔰2023年12月中旬 ~ | |


