カメラ撮影(傾き補正付き)とINIファイルの使用方法 [Android Studio]
目次
1. 作るもの
カメラアプリを起動して撮影した写真を取得して表示します。
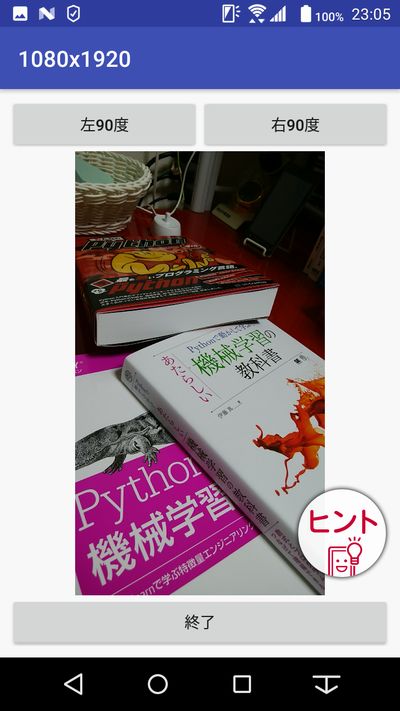
写真によっては横向き、縦向きがありますので「画像の回転」(左右90度)を出来るようにしています。また、カメラを起動する度にURIがストレージに作成されますので、その管理の為にINIファイル(SharedPreferences)の読み書きをしています。
写真のサイズは「1920x1080」ぐらいならば問題なく動作しますが「4000x3000」の12Mになるとスマホのスペックによってはアプリの動作が停止しますのでご注意下さい。
URIは「内部共有ストレージ\Pictures\」に0バイトのファイルで作成されます。そのファイルを自動的に削除する為には、スマホの「戻る」または「終了」ボタンでアプリを終了してください。
※マルチタスクボタンでアプリを終了すると削除されません。
2. 画面設計
[activity_main.xml]
<?xml version="1.0" encoding="utf-8"?>
<android.support.constraint.ConstraintLayout xmlns:android="http://schemas.android.com/apk/res/android"
    xmlns:app="http://schemas.android.com/apk/res-auto"
    xmlns:tools="http://schemas.android.com/tools"
    android:layout_width="match_parent"
    android:layout_height="match_parent"
    tools:context=".MainActivity">

    <LinearLayout
        android:id="@+id/linearLayout2"
        android:layout_width="0dp"
        android:layout_height="wrap_content"
        android:layout_marginEnd="8dp"
        android:layout_marginLeft="8dp"
        android:layout_marginRight="8dp"
        android:layout_marginStart="8dp"
        android:layout_marginTop="8dp"
        android:orientation="horizontal"
        app:layout_constraintEnd_toEndOf="parent"
        app:layout_constraintStart_toStartOf="parent"
        app:layout_constraintTop_toTopOf="parent">

        <Button
            android:id="@+id/button"
            android:layout_width="wrap_content"
            android:layout_height="wrap_content"
            android:layout_weight="1"
            android:text="左90度" />

        <Button
            android:id="@+id/button2"
            android:layout_width="wrap_content"
            android:layout_height="wrap_content"
            android:layout_weight="1"
            android:text="右90度" />
    </LinearLayout>

    <LinearLayout
        android:id="@+id/linearLayout"
        android:layout_width="0dp"
        android:layout_height="wrap_content"
        android:layout_marginBottom="8dp"
        android:layout_marginEnd="8dp"
        android:layout_marginLeft="8dp"
        android:layout_marginRight="8dp"
        android:layout_marginStart="8dp"
        android:orientation="horizontal"
        app:layout_constraintBottom_toBottomOf="parent"
        app:layout_constraintEnd_toEndOf="parent"
        app:layout_constraintStart_toStartOf="parent">

        <Button
            android:id="@+id/button3"
            android:layout_width="wrap_content"
            android:layout_height="wrap_content"
            android:layout_weight="1"
            android:text="終了" />
    </LinearLayout>

    <ImageView
        android:id="@+id/imageView"
        android:layout_width="0dp"
        android:layout_height="0dp"
        app:layout_constraintBottom_toTopOf="@+id/linearLayout"
        app:layout_constraintEnd_toEndOf="parent"
        app:layout_constraintStart_toStartOf="parent"
        app:layout_constraintTop_toBottomOf="@+id/linearLayout2"
        app:srcCompat="@android:drawable/ic_menu_camera" />
</android.support.constraint.ConstraintLayout>
次に「AndroidManifest.xml」の<manifest></manifest>の間に次のコードを追加してください。
<uses-permission android:name="android.permission.WRITE_EXTERNAL_STORAGE"/>
[AndroidManifest.xml]
<?xml version="1.0" encoding="utf-8"?>
<manifest xmlns:android="http://schemas.android.com/apk/res/android"
    package="com.petitmonte.android.myapplication">

    <uses-permission android:name="android.permission.WRITE_EXTERNAL_STORAGE"/>

    <application
        android:allowBackup="true"
        android:icon="@mipmap/ic_launcher"
        android:label="@string/app_name"
        android:roundIcon="@mipmap/ic_launcher_round"
        android:supportsRtl="true"
        android:theme="@style/AppTheme">
        <activity android:name=".MainActivity">
            <intent-filter>
                <action android:name="android.intent.action.MAIN" />

                <category android:name="android.intent.category.LAUNCHER" />
            </intent-filter>
        </activity>
    </application>

</manifest>
3. コーディング
[MainActivity.java]
import android.Manifest;
import android.content.ContentValues;
import android.content.Intent;
import android.content.SharedPreferences;
import android.content.pm.PackageManager;
import android.graphics.Bitmap;
import android.graphics.Matrix;
import android.graphics.drawable.BitmapDrawable;
import android.net.Uri;
import android.os.Environment;
import android.provider.MediaStore;
import android.support.annotation.NonNull;
import android.support.v4.app.ActivityCompat;
import android.support.v7.app.AppCompatActivity;
import android.os.Bundle;
import android.view.View;
import android.widget.ImageView;
import android.widget.Toast;

import java.util.ArrayList;

public class MainActivity extends AppCompatActivity {

    // リクエスト制御用のコード(任意の数値)
    private final int REQUESTCODE_ACTIVITY = 1000;
    private final int REQUESTCODE_PERMISSION = 2000;

    // INIファイルのアクセス用
    private SharedPreferences.Editor editor;

    // URIリスト
    private ArrayList<Uri> UriList = new ArrayList<>();

    @Override
    protected void onCreate(Bundle savedInstanceState) {
        super.onCreate(savedInstanceState);
        setContentView(R.layout.activity_main);

        // スケールタイプの設定
        // CENTER_INSIDE ... 原画像の縦横比を維持してイメージビューの寸法以下にする
        ImageView iv = findViewById(R.id.imageView);
        iv.setScaleType(ImageView.ScaleType.CENTER_INSIDE);

        // INIファイルのアクセス用(MyINIは任意の文字列)
        SharedPreferences prefs  = getSharedPreferences("MyINI",MODE_PRIVATE);
        editor = prefs.edit();

        // INIファイルからURIリストの情報を読み込む
        int count = prefs.getInt("count",0);
        for(int i=0;i<count;i++){
            try {
                String str = prefs.getString("uri" + i,"");
                UriList.add(Uri.parse(str));
            } catch (Exception e){}
        }

        // ボタンイベント(3つ)
        View.OnClickListener Events =  new OnButtonClick();
        findViewById(R.id.button).setOnClickListener(Events);
        findViewById(R.id.button2).setOnClickListener(Events);
        findViewById(R.id.button3).setOnClickListener(Events);

        // イメージビューのクリックイベント
        findViewById(R.id.imageView).setOnClickListener(new View.OnClickListener() {
            @Override
            public void onClick(View v) {

            // パーミッションの確認
            if (ActivityCompat.checkSelfPermission(MainActivity.this,
                Manifest.permission.WRITE_EXTERNAL_STORAGE) !=
                PackageManager.PERMISSION_GRANTED) {

                // ストレージの許可を求めるダイアログを表示する
                ActivityCompat.requestPermissions(MainActivity.this,
                      new String[]{Manifest.permission.WRITE_EXTERNAL_STORAGE},
                      REQUESTCODE_PERMISSION);
                return;
            }

            // 画像設定
            String filename = Environment.getExternalStorageDirectory() + "/dummy.jpg";
            ContentValues values = new ContentValues();
            values.put(MediaStore.Images.Media.TITLE, filename);
            values.put(MediaStore.Images.Media.MIME_TYPE, "image/jpeg");

            // URIの生成
            Uri uri = getContentResolver().
                        insert(MediaStore.Images.Media.EXTERNAL_CONTENT_URI, values);
            UriList.add(uri);

            // INIファイルにURIリストの情報を書き込む
            for (int i = 0; i < UriList.size(); i++) {
                editor.putString("uri" + i, UriList.get(i).toString());
            }
            editor.putInt("count", UriList.size());
            editor.apply();

            // カメラ撮影用のアプリを起動する
            Intent intent = new Intent(MediaStore.ACTION_IMAGE_CAPTURE);
            intent.putExtra(MediaStore.EXTRA_OUTPUT, uri);
            startActivityForResult(intent, REQUESTCODE_ACTIVITY);
            }
        });
    }

    // ストレージへのアクセスが許可された際の処理
    @Override
    public void onRequestPermissionsResult(int requestCode, @NonNull String[] permissions,
                                           @NonNull int[] grantResults) {
        if(requestCode ==  REQUESTCODE_PERMISSION && grantResults[0] == PackageManager.PERMISSION_GRANTED){
            // 必要であればココにも処理を記述する
        }
    }

    // カメラ撮影用のアプリから戻った際の処理
    @Override
    protected void onActivityResult(int requestCode, int resultCode, Intent data) {

        // カメラアプリからの戻り
        if(requestCode == REQUESTCODE_ACTIVITY){

            // 必要であればココにも処理を記述する

            // 写真撮影後に確定した場合
            if(resultCode == RESULT_OK){
                try{
                    // イメージビューに画像を設定する
                    Bitmap bmp = MediaStore.Images.Media.getBitmap(getContentResolver(),
                                   UriList.get(UriList.size()-1));
                    ImageView iv = findViewById(R.id.imageView);
                    iv.setImageBitmap(bmp);

                    // 画像サイズの表示
                    String width = String.valueOf(bmp.getWidth());
                    String height = String.valueOf(bmp.getHeight());
                    MainActivity.this.setTitle(width + "x" + height);
                }catch (Exception e){
                    Toast.makeText(MainActivity.this,"メモリ不足です。",
                                   Toast.LENGTH_SHORT);
                }
            }
        }
    }

    // 3つのボタンイベント
    private class OnButtonClick implements View.OnClickListener{
        @Override
        public void onClick(View v) {

            // 左右の回転ボタン
            if(v.getId() == R.id.button || v.getId() == R.id.button2){

                // 回転角度
                int rotate;
                if(v.getId() == R.id.button){
                    rotate = 270;
                }else{
                    rotate = 90;
                }

                // イメージビューから画像を取得する
                ImageView iv = (ImageView)findViewById(R.id.imageView ) ;
                Bitmap bmp = ((BitmapDrawable)iv.getDrawable()).getBitmap();

                // 画像を回転してイメージビューに再設定する
                Matrix matrix = new Matrix();
                matrix.postRotate(rotate);
                bmp = Bitmap.createBitmap(bmp , 0, 0,
                                          bmp.getWidth(), bmp.getHeight(), matrix, true);
                iv.setImageBitmap(bmp);

                // 画像サイズの表示
                String width = String.valueOf(bmp.getWidth());
                String height = String.valueOf(bmp.getHeight());
                MainActivity.this.setTitle(width + "x" + height);

            // 終了ボタン
            }else{
                finish();
            }
        }
    }

    @Override
    protected void onDestroy() {
        // URIリストをクリア
        for (Uri uri : UriList) {
            // File.exists()はアクセス権限がないファイルが"false"になるので使用しない
            try {
                getContentResolver().delete(uri, null, null);
            }catch (Exception e){
            }
        }
        super.onDestroy();
    }
}
応用として各自で傾きを自動補正すると良いです。
スポンサーリンク
関連記事
公開日:2018年05月25日

記事NO:02664
プチモンテ ※この記事を書いた人
 | |
| 💻 ITスキル・経験 サーバー構築からWebアプリケーション開発。IoTをはじめとする電子工作、ロボット、人工知能やスマホ/OSアプリまで分野問わず経験。 画像処理/音声処理/アニメーション、3Dゲーム、会計ソフト、PDF作成/編集、逆アセンブラ、EXE/DLLファイルの書き換えなどのアプリを公開。詳しくは自己紹介へ |
| 🎵 音楽制作 BGMは楽器(音源)さえあれば、何でも制作可能。歌モノは主にロック、バラード、ポップスを制作。歌詞は抒情詩、抒情的な楽曲が多い。楽曲制作は🔰2023年12月中旬 ~ | |
オリジナルゲームをつくってみました✨
Peasant Samurai ~ 百姓ノ持チタル国 (2026/8/3 公開予定)https://store.steampowered.com/app/4880700/Peasant_Samurai/
「民」が主役の幻想戦国RTS/街づくりゲーム