BOT対策でGoogle reCAPTCHA認証を利用する [PHP]
Webサイトへのログイン、ブログや掲示板のコメント投稿などで、プログラム(BOT)による自動的なログイン試行、投稿を排除する為にPHPで「Google reCAPTCHA認証」を使用する方法です。
今回のサンプルコードはPHPですが、Ruby on Rails、Python、Javaなどでも同様な操作で実現が可能です。
作るもの
reCAPTCHA v2のInvisible reCAPTCHAを使用します。
Invisible reCAPTCHAはボタンを押した時にBOTと判定した場合のみ次のような画像認証が表示されます。
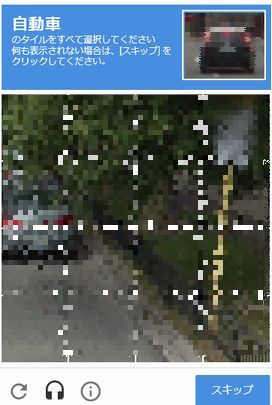
人間と判定した場合は画像認証は表示されない為、便利です。
1. reCAPTCHAの種類
reCAPTCHAには無償の「reCAPTCHA v2」「reCAPTCHA v3」と有償の「reCAPTCHA Enterprise」があります。
1-1. reCAPTCHA v2
次の3種類あります。
「私はロボットではありません」チェックボックス (CheckBox reCAPTCHA)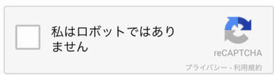 | チェックボックスを使用してリクエストを検証 |
非表示 reCAPTCHA バッジ(Invisible reCAPTCHA)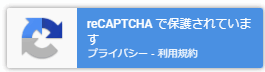 ※後述の画像も参照 | バックグラウンドでリクエストを検証 |
| reCAPTCHA Android | Android アプリでのリクエストを検証 |
返却されるJSONの「success」でBOT判定のtrue/falseがわかります。
[JSON]
{
  "success": true|false,
  "challenge_ts": timestamp,  // timestamp of the challenge load (ISO format yyyy-MM-dd'T'HH:mm:ssZZ)
  "hostname": string,         // the hostname of the site where the reCAPTCHA was solved
  "error-codes": [...]        // optional
}
出典:https://developers.google.com/recaptcha/docs/verify
ちなみに、Invisible reCAPTCHAのロゴの通常時はブラウザの右下に配置されます。マウスをのせると前述のようにロゴが長方形に変化します。

1-2. reCAPTCHA v3
reCAPTCHA v3はリクエストを「スコア」で検証します。v2のようにJSONの「success」もありますがBOTの判定ではありません。
[JSON]
{
  "success": true|false,      // whether this request was a valid reCAPTCHA token for your site
  "score": number             // the score for this request (0.0 - 1.0)
  "action": string            // the action name for this request (important to verify)
  "challenge_ts": timestamp,  // timestamp of the challenge load (ISO format yyyy-MM-dd'T'HH:mm:ssZZ)
  "hostname": string,         // the hostname of the site where the reCAPTCHA was solved
  "error-codes": [...]        // optional
}
出典:https://developers.google.com/recaptcha/docs/v3
1-3. 詳細
次の公式サイトをご覧ください。
https://developers.google.com/recaptcha
https://www.google.com/recaptcha/about/
https://developers.google.com/recaptcha/intro
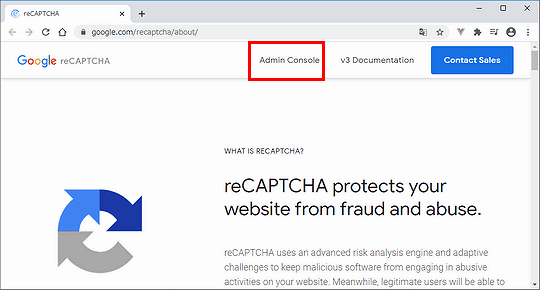
2. reCAPTCHAの導入
https://www.google.com/recaptcha/about/
にアクセスして「Admin Console」をクリックします。
後は次のような感じで進めていきます。

3. HTML/PHPのサンプルコード
[HTML - test.html]
<html>
  <head>
    <title>reCAPTCHA demo: Simple page</title>
     <script src="https://www.google.com/recaptcha/api.js" async defer></script>
     <script>
       function onSubmit(token) {
         document.getElementById("demo-form").submit();
       }
     </script>
  </head>
  <body>
    <form id='demo-form' action="test.php" method="POST">
      <button class="g-recaptcha" data-sitekey="サイトキー" data-callback='onSubmit'>Submit</button>
      <br/>
    </form>
  </body>
</html>
出典:https://developers.google.com/recaptcha/docs/invisible
[PHP - test.php]
<?php
// URL
$url = 'https://www.google.com/recaptcha/api/siteverify';
// パラメータ
$param = array(
'secret' => 'シークレットキー',
'response' => $_POST['g-recaptcha-response']
);
// コンテキスト
$context = array(
'http' => array(
'method' => 'POST',
'header' => 'Content-Type: application/x-www-form-urlencoded\r\n',
'content' => http_build_query($param)
)
);
// POSTを実行する
$json = file_get_contents($url, false, stream_context_create($context));
// 追記:環境によってココでjson_decode()を使用して$jsonのデコードが必要かも?
// 認証の結果を表示する
// ※$json['hostname']も検証した方が良いかも知れない
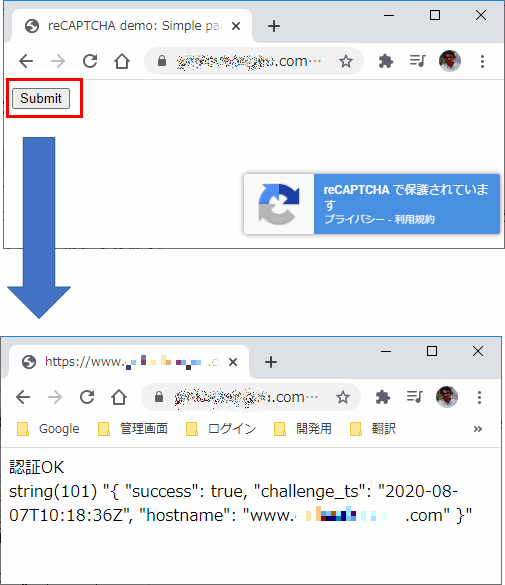
if($json['success']){
echo "認証OK<br>";
}else{
echo "認証が失敗しました。<br>";
}
var_dump($json);
?>
reCAPTCHAの管理画面は次のURLです。
https://www.google.com/recaptcha/admin
以上となります。
関連記事

プチモンテ ※この記事を書いた人
 | |
| 💻 ITスキル・経験 サーバー構築からWebアプリケーション開発。IoTをはじめとする電子工作、ロボット、人工知能やスマホ/OSアプリまで分野問わず経験。 画像処理/音声処理/アニメーション、3Dゲーム、会計ソフト、PDF作成/編集、逆アセンブラ、EXE/DLLファイルの書き換えなどのアプリを公開。詳しくは自己紹介へ |
| 🎵 音楽制作 BGMは楽器(音源)さえあれば、何でも制作可能。歌モノは主にロック、バラード、ポップスを制作。歌詞は抒情詩、抒情的な楽曲が多い。楽曲制作は🔰2023年12月中旬 ~ | |