MySQLのインストールからコマンド操作(ユーザ/データベース/テーブルの作成)やODBC設定
MySQLの「インストール」からコマンドによる「ユーザー作成、データベース作成、テーブル作成」と「ODBCの設定」をご紹介します。
MySQLの初期設定、基本設定を行いますので、この記事を読み終われば、そのままプログラム開発に移れます。
今回は最新版のMySQL 8.0.11(2018年4月19日版)を使用します。時間が経過すると新しいバージョンになりますが、基本的な操作は同じです。
目次
1. MySQLの種類
2. MySQL Community Editionの種類
3. MySQLのダウンロード
4. MySQLのインストール
5. コマンド プロンプトの起動
6. データベースの作成
7. ユーザーの作成、権限の付与
8. テーブルの作成
9. ODBCの設定
10. サービスの設定(自動/手動の切り替え)
11. my.iniファイルの場所
12. デフォルトのmy.iniファイル
1. MySQLの種類
MySQLにはいくつか種類がありますが、この記事では無償の「MySQL Community Edition」を使用します。
| 無償(GPL) | MySQL Community Edition |
|---|---|
| 有償(commercial) | Oracle MySQL Cloud Service |
| 有償(commercial) | MySQL Enterprise Edition |
| 有償(commercial) | MySQL Cluster CGE |
2. MySQL Community Editionの種類
MySQL Community Editionをダウンロードする際には2種類あります。
| MySQL Installer MSI | MySQLを自動でインストールする。 |
|---|---|
| ZIP Archive | MySQLを全て手動で設定する。my-default.ini(my.ini)が付属していないのでネットから探す必要がある。 ※my.iniは12. デフォルトのmy.iniファイルで公開中。 |
※今回はMySQL Installer MSIを使用します。
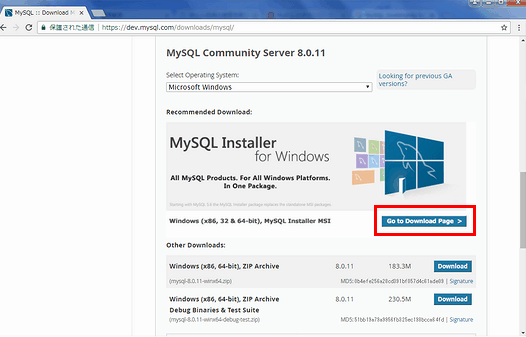
3. MySQLのダウンロード
次のサイトにアクセスします。
https://dev.mysql.com/downloads/mysql/
「Go to Download Page >」をクリックします。
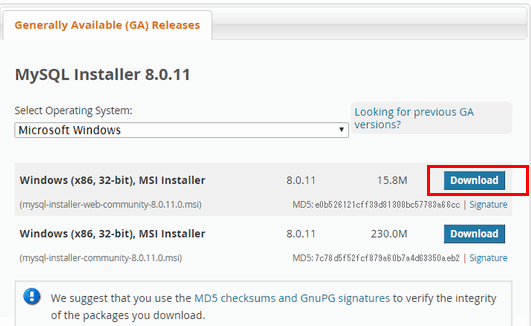
「mysql-installer-web-community」の方をダウンロードします。
mysql-installer-web-communityは軽量版で必要なファイルをインストール中にダウンロードします。mysql-installer-communityは最初から全てをダウンロードします。
「No thanks, just start my download.」を選択します。
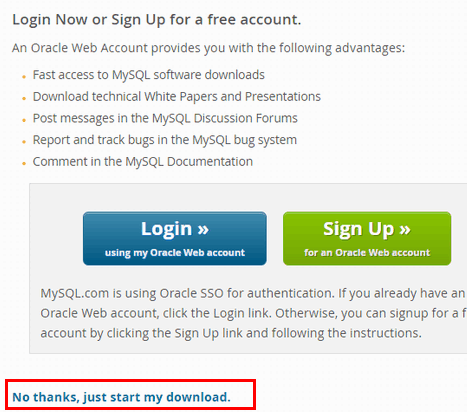
すると、ダウンロードが開始されます。
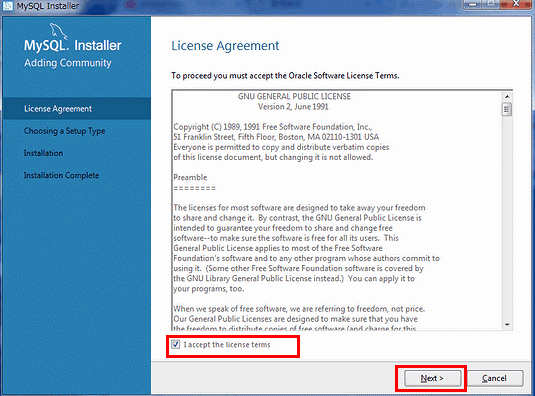
4. MySQLのインストール
mysql-installer-web-community-8.0.11.0.msiをクリックします。
※8.0.11.0はバージョン。ダウンロードした時期によって異なります。
「I accept the license terms」を選択して「Next」をクリック。
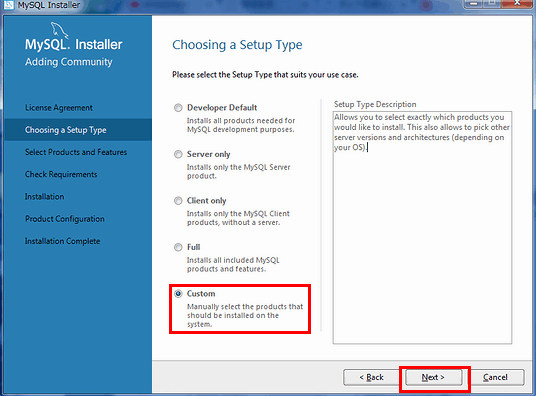
必要最低限な物だけインストールするので「Custom」を選択して「Next」をクリックします。
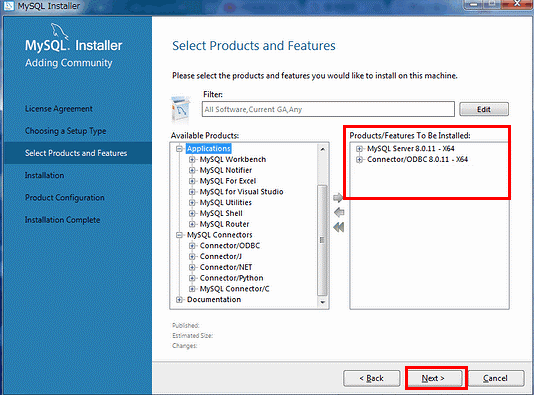
左のリストから「MySQL Server8.0.11 X64」「Connector/ODBC 8.0.11 X64」を右にリストに移動します。移動するには左右のリストの間にある矢印で行います。※8.0.11はバージョン。X64は64bitの意味。
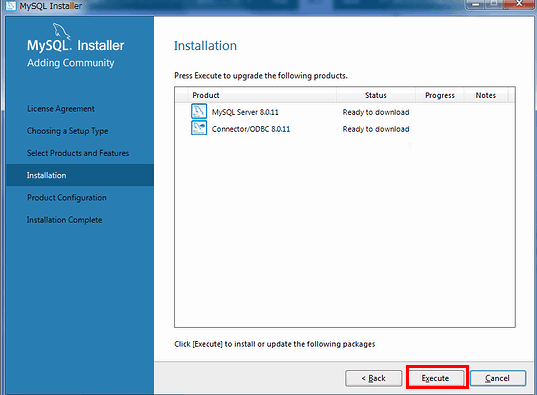
どんどん進んでいきます。
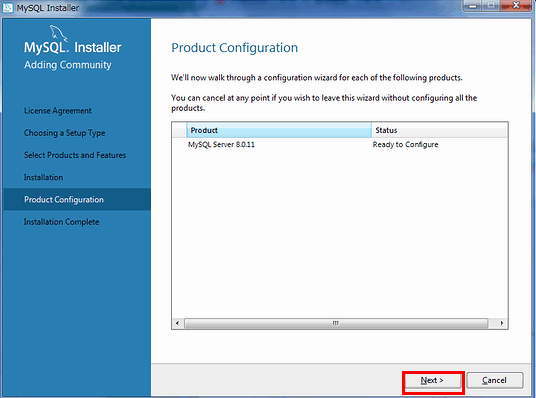
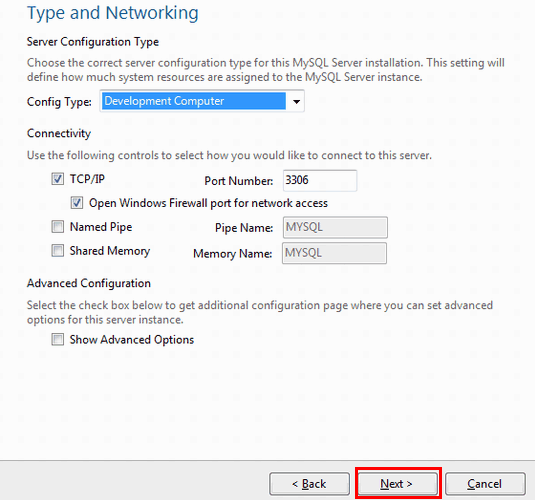
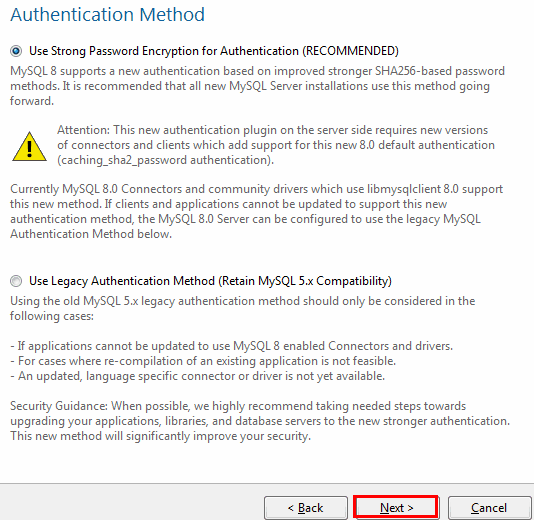
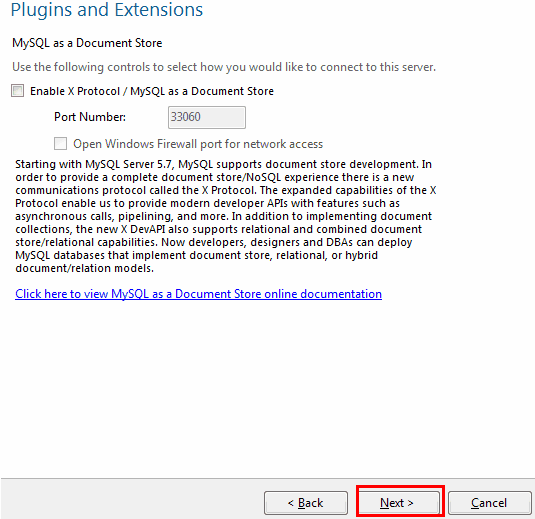
ここからMySQLの設定ですが、デフォルトのままでOKです。

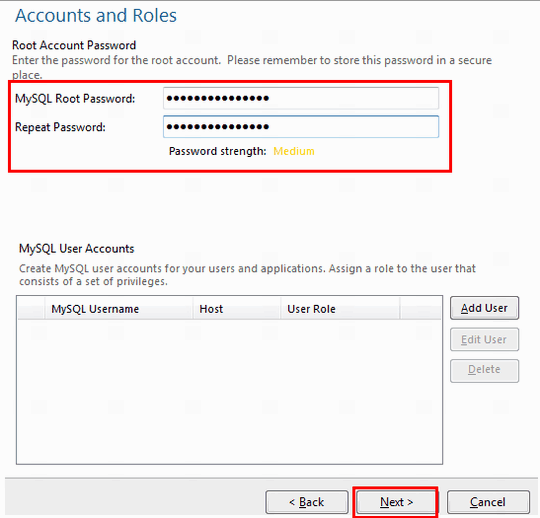
rootのパスワードを設定します。上下に同じパスワードを入力します。
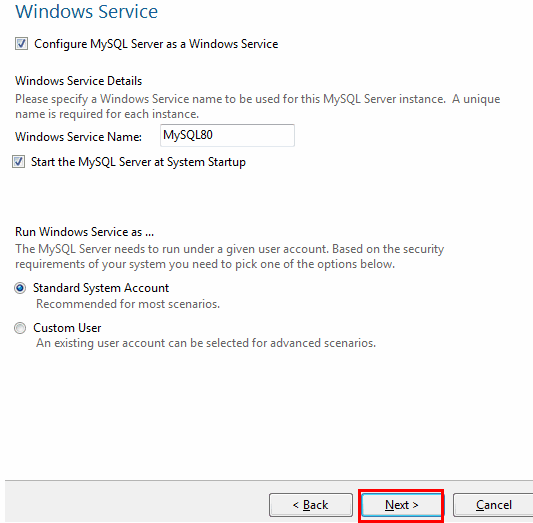
次はWindowsサービスの設定です。そのままでOKです。
どんどん進んでいきます。
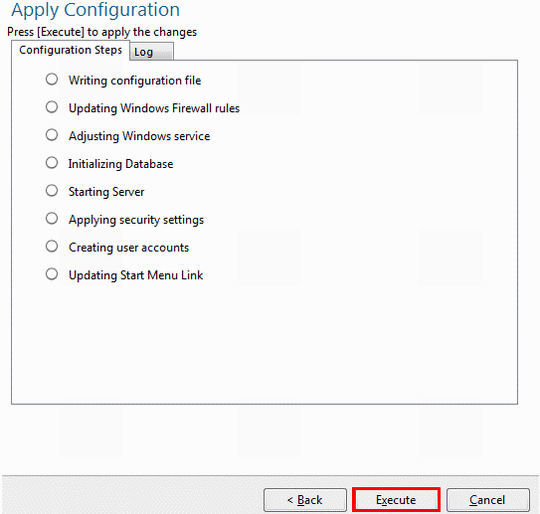
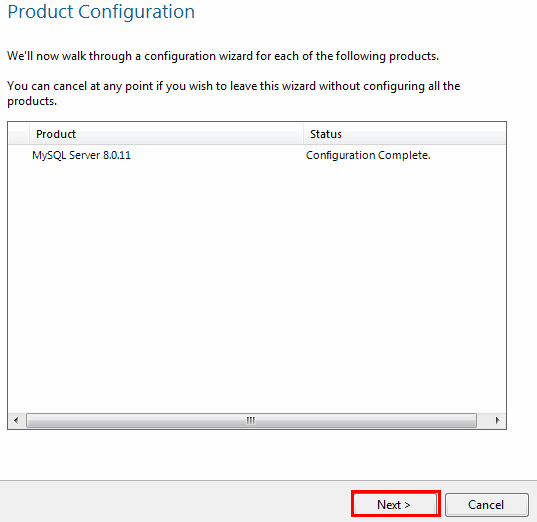
最後に「finish」でインストールの完了となります。
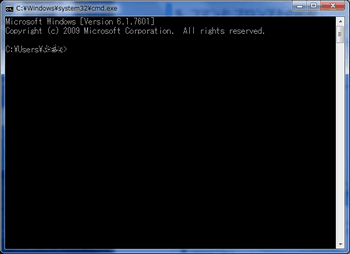
5. コマンド プロンプトの起動
MySQLを操作するにはコマンド プロンプトを使用します。
コマンド プロンプトの起動方法は次の2種類あります。
Windowsの画面左下にあるWindowsメニューからアクセサリの「コマンド プロンプト」を起動する。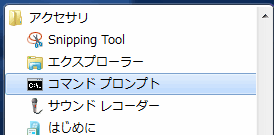 |
「Winキー + Rキー」で「cmd」を入力してOKボタンを押す。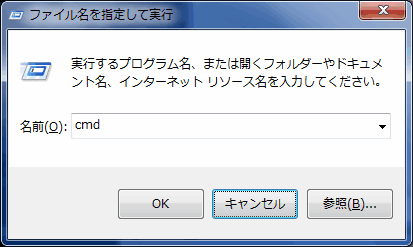 |
[コマンド プロンプトの起動例]
6. データベースの作成
データベースを作成する前にMySQL(mysql.exe)のパスを確認します。
初期設定の場合は
C:\Program Files\MySQL\MySQL Server 8.0\bin
です。バージョンが違う場合や異なる場所にインストールした場合はMySQL(mysql.exe)が何処にあるか確認してください。
それでは「データベースの作成」に進みます。
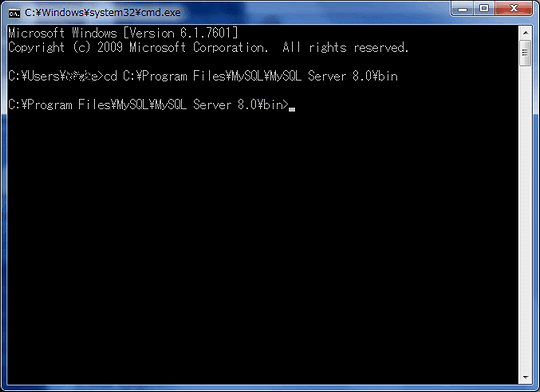
コマンド プロンプトを起動します。そして、MySQLのパスへ移動する為に次のコマンドを入力してエンターキーを押します。
cd C:\Program Files\MySQL\MySQL Server 8.0\bin
次にroot権限でMySQLにログインします。
mysql -u root -p
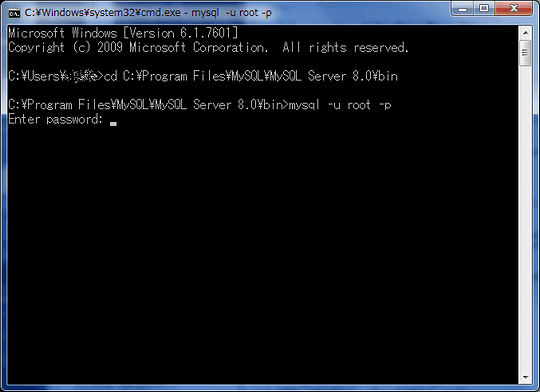
パスワードを入力するとMySQLにログインできます。このパスワードはインストール時に設定したパスワードです。(コピペで貼り付け可能)

次にデータベース(sample_db)を作成します。
CREATE DATABASE sample_db;
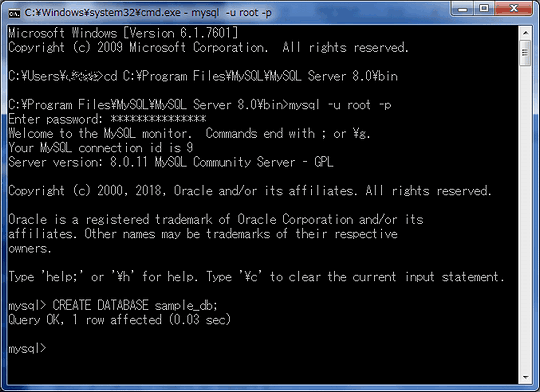
これでsample_dbというデータベースが作成されました。
// データベースを作成する
CREATE DATABASE データベース名;
// データベースを削除する
DROP DATABASE データベース名;
// データベースの一覧を表示する
SHOW DATABASES;
7. ユーザーの作成、権限の付与
次のユーザーを作成します。
ユーザー名(test)、パスワード(1234567890)
CREATE USER 'test'@'localhost' IDENTIFIED BY '1234567890';
testにデータベース(sample_db)の全ての操作権限を付与する。
GRANT ALL ON sample_db.* TO 'test'@'localhost';
// ユーザーの一覧を表示する
SELECT Host, User FROM mysql.user;
8. テーブルの作成
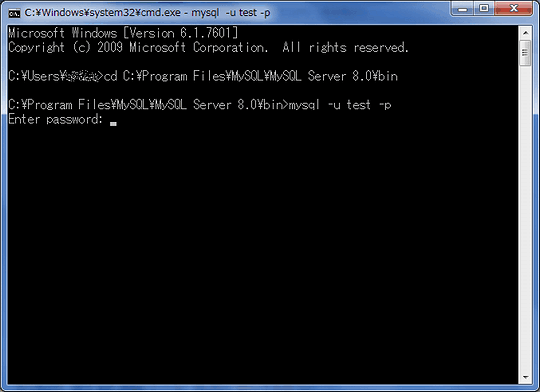
テーブルの作成はrootではなく、新ユーザーのtestで作成するので、コマンド プロンプトを一旦、閉じて再起動して下さい。
MySQLのパスへ移動する。
cd C:\Program Files\MySQL\MySQL Server 8.0\bin
testでログインする。
mysql -u test -p
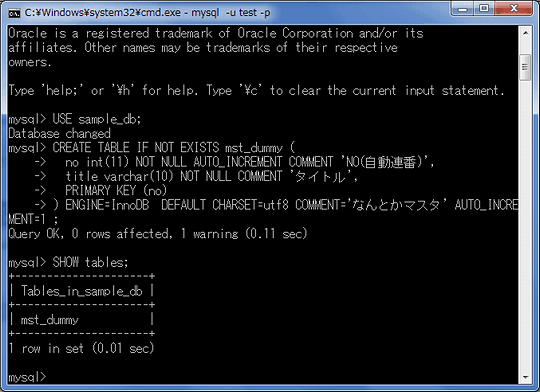
次にsample_dbのデータベースを選択します。
USE sample_db;
そして、mst_dummyテーブルを作成する。
CREATE TABLE IF NOT EXISTS mst_dummy (
  no int(11) NOT NULL AUTO_INCREMENT COMMENT 'NO(自動連番)',
  title varchar(10) NOT NULL COMMENT 'タイトル',
  PRIMARY KEY (no)
) ENGINE=InnoDB  DEFAULT CHARSET=utf8 COMMENT='なんとかマスタ' AUTO_INCREMENT=1 ;
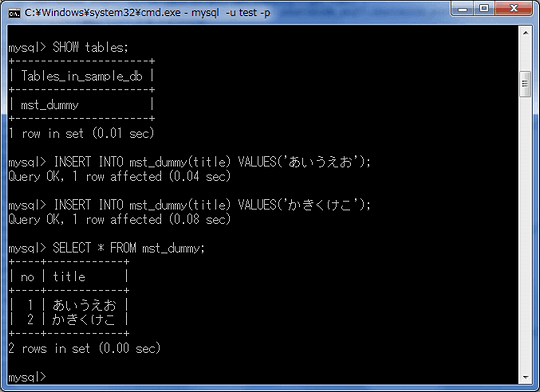
テーブルの一覧を表示する。
SHOW TABLES;
テーブルにデータを1行登録する。
INSERT INTO mst_dummy(title) VALUES('あいうえお');
テーブルにデータをもう1行登録する。
INSERT INTO mst_dummy(title) VALUES('かきくけこ');
テーブルからデータを取得する。
SELECT * FROM mst_dummy;
以上でMySQLのコマンド解説は完了です。
9. ODBCの設定
Open Database Connectivity(ODBC)はプログラミング言語からデータベースにアクセスする事ができる共通インタフェースです。OS側で設定を行うと、プログラムから簡単にアクセスできるようになります。
Windows7では[コントロールパネル][管理ツール]の「データ ソース (ODBC)」です。※Windows10の方は「ODBC データ ソース」で検索。
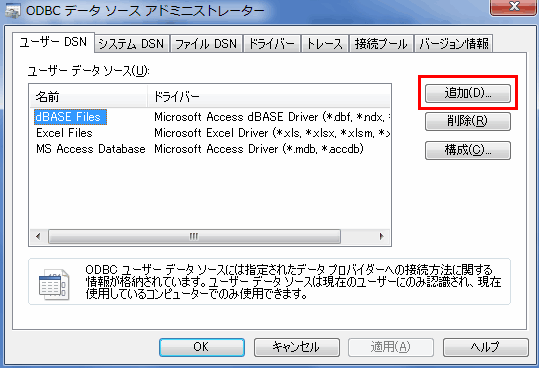
ODBCデータソースアドミニストレーターで「追加」ボタンを押します。
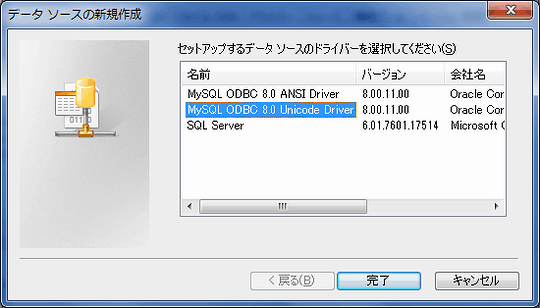
「MySQL ODBC 8.0 Unicode Driver」を選択して完了を押します。
「Data Source Name」(DSN)に任意の名称を入力します。「TCP/IP Server」にはlocalhost。「User」「Password」「Database」には先ほど作成したユーザー、パスワード、データベース名を設定します。
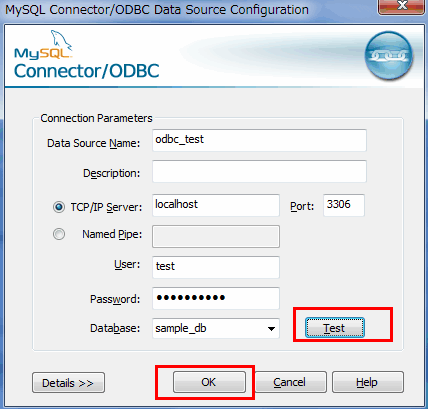
全て入力したら「Test」ボタンで接続確認を行います。問題なければOKボタンを押します。
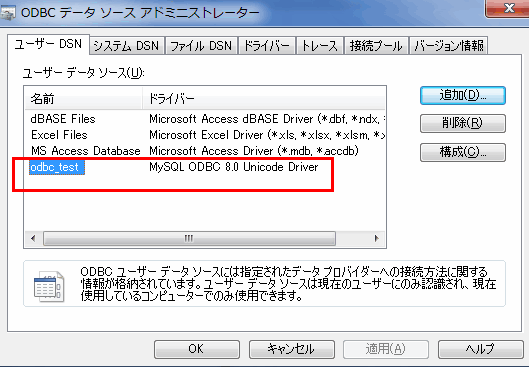
「odbc_test」が追加されました。最後にもう一度OKボタンを押します。
OS側のODBCの設定はこれで完了です。
プログラム側からは「Data Source Name」とユーザー、パスワード、データベース名を使用すればデータベースにアクセスできるようになります。
※DSN名だけでもOKな場合もあります。
10. サービスの設定(自動/手動の切り替え)
初期設定のままですと、Windows起動時にMySQLも自動的に起動します。
MySQLはサービスに登録されていますのでサービス側で「自動起動」「手動起動」の切り替えを設定する事が可能です。開発時には「自動」で未使用時には「手動」にして置くと良いです。
Windows7では[コントロールパネル][管理ツール]の「サービス」でサービスを起動します。※Windows10の方は「サービス」で検索。
MySQLのサービス名称はMySQL80です。
※バージョンが異なる場合は「80」の部分が異なります。
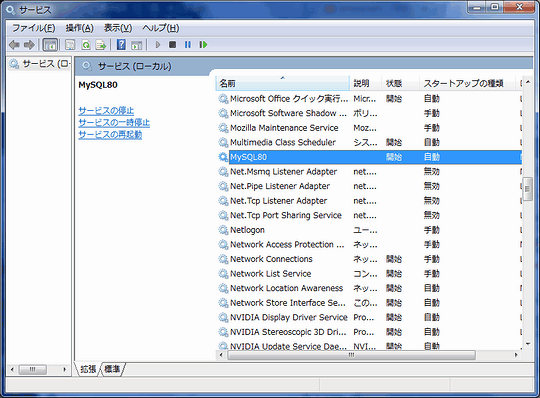
MySQL80をダブルクリックすると設定画面が表示されます。
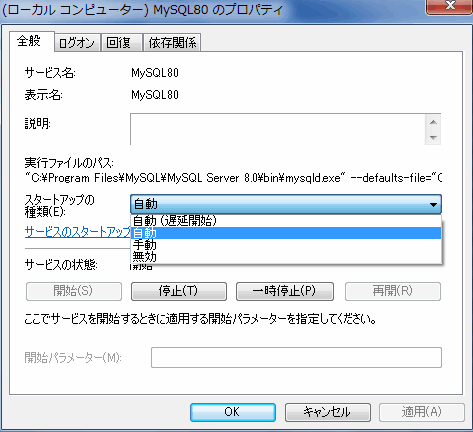
自動、手動の切り替え、サービスの開始、停止を行う事が可能です。
11. my.iniファイルの場所
MySQLの設定ファイルの「my.ini」は次のパスにあります。
C:\ProgramData\MySQL\MySQL Server 8.0
ProgramDataフォルダは隠しフォルダになっています。
[コントロールパネル][フォルダオプション]の「表示」タブで隠しファイル、フォルダを表示するように設定してください。
12. デフォルトのmy.iniファイル
MySQL8.0.11のデフォルトのmy.iniファイルの中身です。ZIP Archive版を使用する際などに参考にしてください。
[my.ini]
# Other default tuning values
# MySQL Server Instance Configuration File
# ----------------------------------------------------------------------
# Generated by the MySQL Server Instance Configuration Wizard
#
#
# Installation Instructions
# ----------------------------------------------------------------------
#
# On Linux you can copy this file to /etc/my.cnf to set global options,
# mysql-data-dir/my.cnf to set server-specific options
# (@localstatedir@ for this installation) or to
# ~/.my.cnf to set user-specific options.
#
# On Windows you should keep this file in the installation directory
# of your server (e.g. C:\Program Files\MySQL\MySQL Server X.Y). To
# make sure the server reads the config file use the startup option
# "--defaults-file".
#
# To run the server from the command line, execute this in a
# command line shell, e.g.
# mysqld --defaults-file="C:\Program Files\MySQL\MySQL Server X.Y\my.ini"
#
# To install the server as a Windows service manually, execute this in a
# command line shell, e.g.
# mysqld --install MySQLXY --defaults-file="C:\Program Files\MySQL\MySQL Server X.Y\my.ini"
#
# And then execute this in a command line shell to start the server, e.g.
# net start MySQLXY
#
#
# Guidelines for editing this file
# ----------------------------------------------------------------------
#
# In this file, you can use all long options that the program supports.
# If you want to know the options a program supports, start the program
# with the "--help" option.
#
# More detailed information about the individual options can also be
# found in the manual.
#
# For advice on how to change settings please see
# http://dev.mysql.com/doc/refman/5.7/en/server-configuration-defaults.html
#
#
# CLIENT SECTION
# ----------------------------------------------------------------------
#
# The following options will be read by MySQL client applications.
# Note that only client applications shipped by MySQL are guaranteed
# to read this section. If you want your own MySQL client program to
# honor these values, you need to specify it as an option during the
# MySQL client library initialization.
#
[client]

# pipe=

# socket=MYSQL

port=3306

[mysql]
no-beep

# default-character-set=


# SERVER SECTION
# ----------------------------------------------------------------------
#
# The following options will be read by the MySQL Server. Make sure that
# you have installed the server correctly (see above) so it reads this
# file.
#
# server_type=3
[mysqld]

# The next three options are mutually exclusive to SERVER_PORT below.
# skip-networking
# enable-named-pipe
# shared-memory

# shared-memory-base-name=MYSQL

# The Pipe the MySQL Server will use
# socket=mysql=MYSQL

# The TCP/IP Port the MySQL Server will listen on
port=3306

# Path to installation directory. All paths are usually resolved relative to this.
# basedir="C:/Program Files/MySQL/MySQL Server 8.0/"

# Path to the database root
datadir=C:/ProgramData/MySQL/MySQL Server 8.0/Data

# The default character set that will be used when a new schema or table is
# created and no character set is defined
# character-set-server=

# The default authentication plugin to be used when connecting to the server
default_authentication_plugin=caching_sha2_password

# The default storage engine that will be used when create new tables when
default-storage-engine=INNODB

# Set the SQL mode to strict
sql-mode="STRICT_TRANS_TABLES,NO_ENGINE_SUBSTITUTION"

# General and Slow logging.
log-output=FILE
general-log=0
general_log_file="COMPUTER_NAME.log"
slow-query-log=1
slow_query_log_file="COMPUTER_NAME-slow.log"
long_query_time=10

# Binary Logging.
# log-bin

# Error Logging.
log-error="COMPUTER_NAME.err"

# Server Id.
server-id=1

# Secure File Priv.
secure-file-priv="C:/ProgramData/MySQL/MySQL Server 8.0/Uploads"

# The maximum amount of concurrent sessions the MySQL server will
# allow. One of these connections will be reserved for a user with
# SUPER privileges to allow the administrator to login even if the
# connection limit has been reached.
max_connections=151

# The number of open tables for all threads. Increasing this value
# increases the number of file descriptors that mysqld requires.
# Therefore you have to make sure to set the amount of open files
# allowed to at least 4096 in the variable "open-files-limit" in
# section [mysqld_safe]
table_open_cache=2000

# Maximum size for internal (in-memory) temporary tables. If a table
# grows larger than this value, it is automatically converted to disk
# based table This limitation is for a single table. There can be many
# of them.
tmp_table_size=16M

# How many threads we should keep in a cache for reuse. When a client
# disconnects, the client's threads are put in the cache if there aren't
# more than thread_cache_size threads from before.  This greatly reduces
# the amount of thread creations needed if you have a lot of new
# connections. (Normally this doesn't give a notable performance
# improvement if you have a good thread implementation.)
thread_cache_size=10

#*** MyISAM Specific options
# The maximum size of the temporary file MySQL is allowed to use while
# recreating the index (during REPAIR, ALTER TABLE or LOAD DATA INFILE.
# If the file-size would be bigger than this, the index will be created
# through the key cache (which is slower).
myisam_max_sort_file_size=100G

# If the temporary file used for fast index creation would be bigger
# than using the key cache by the amount specified here, then prefer the
# key cache method.  This is mainly used to force long character keys in
# large tables to use the slower key cache method to create the index.
myisam_sort_buffer_size=8M

# Size of the Key Buffer, used to cache index blocks for MyISAM tables.
# Do not set it larger than 30% of your available memory, as some memory
# is also required by the OS to cache rows. Even if you're not using
# MyISAM tables, you should still set it to 8-64M as it will also be
# used for internal temporary disk tables.
key_buffer_size=8M

# Size of the buffer used for doing full table scans of MyISAM tables.
# Allocated per thread, if a full scan is needed.
read_buffer_size=0

read_rnd_buffer_size=0

#*** INNODB Specific options ***
# innodb_data_home_dir=

# Use this option if you have a MySQL server with InnoDB support enabled
# but you do not plan to use it. This will save memory and disk space
# and speed up some things.
# skip-innodb

# If set to 1, InnoDB will flush (fsync) the transaction logs to the
# disk at each commit, which offers full ACID behavior. If you are
# willing to compromise this safety, and you are running small
# transactions, you may set this to 0 or 2 to reduce disk I/O to the
# logs. Value 0 means that the log is only written to the log file and
# the log file flushed to disk approximately once per second. Value 2
# means the log is written to the log file at each commit, but the log
# file is only flushed to disk approximately once per second.
innodb_flush_log_at_trx_commit=1

# The size of the buffer InnoDB uses for buffering log data. As soon as
# it is full, InnoDB will have to flush it to disk. As it is flushed
# once per second anyway, it does not make sense to have it very large
# (even with long transactions).
innodb_log_buffer_size=1M

# InnoDB, unlike MyISAM, uses a buffer pool to cache both indexes and
# row data. The bigger you set this the less disk I/O is needed to
# access data in tables. On a dedicated database server you may set this
# parameter up to 80% of the machine physical memory size. Do not set it
# too large, though, because competition of the physical memory may
# cause paging in the operating system.  Note that on 32bit systems you
# might be limited to 2-3.5G of user level memory per process, so do not
# set it too high.
innodb_buffer_pool_size=8M

# Size of each log file in a log group. You should set the combined size
# of log files to about 25%-100% of your buffer pool size to avoid
# unneeded buffer pool flush activity on log file overwrite. However,
# note that a larger logfile size will increase the time needed for the
# recovery process.
innodb_log_file_size=48M

# Number of threads allowed inside the InnoDB kernel. The optimal value
# depends highly on the application, hardware as well as the OS
# scheduler properties. A too high value may lead to thread thrashing.
innodb_thread_concurrency=9

# The increment size (in MB) for extending the size of an auto-extend InnoDB system tablespace file when it becomes full.
innodb_autoextend_increment=64

# The number of regions that the InnoDB buffer pool is divided into.
# For systems with buffer pools in the multi-gigabyte range, dividing the buffer pool into separate instances can improve concurrency,
# by reducing contention as different threads read and write to cached pages.
innodb_buffer_pool_instances=8

# Determines the number of threads that can enter InnoDB concurrently.
innodb_concurrency_tickets=5000

# Specifies how long in milliseconds (ms) a block inserted into the old sublist must stay there after its first access before
# it can be moved to the new sublist.
innodb_old_blocks_time=1000

# It specifies the maximum number of .ibd files that MySQL can keep open at one time. The minimum value is 10.
innodb_open_files=300

# When this variable is enabled, InnoDB updates statistics during metadata statements.
innodb_stats_on_metadata=0

# When innodb_file_per_table is enabled (the default in 5.6.6 and higher), InnoDB stores the data and indexes for each newly created table
# in a separate .ibd file, rather than in the system tablespace.
innodb_file_per_table=1

# Use the following list of values: 0 for crc32, 1 for strict_crc32, 2 for innodb, 3 for strict_innodb, 4 for none, 5 for strict_none.
innodb_checksum_algorithm=0

# The number of outstanding connection requests MySQL can have.
# This option is useful when the main MySQL thread gets many connection requests in a very short time.
# It then takes some time (although very little) for the main thread to check the connection and start a new thread.
# The back_log value indicates how many requests can be stacked during this short time before MySQL momentarily
# stops answering new requests.
# You need to increase this only if you expect a large number of connections in a short period of time.
back_log=80

# If this is set to a nonzero value, all tables are closed every flush_time seconds to free up resources and
# synchronize unflushed data to disk.
# This option is best used only on systems with minimal resources.
flush_time=0

# The minimum size of the buffer that is used for plain index scans, range index scans, and joins that do not use
# indexes and thus perform full table scans.
join_buffer_size=256K

# The maximum size of one packet or any generated or intermediate string, or any parameter sent by the
# mysql_stmt_send_long_data() C API function.
max_allowed_packet=4M

# If more than this many successive connection requests from a host are interrupted without a successful connection,
# the server blocks that host from performing further connections.
max_connect_errors=100

# Changes the number of file descriptors available to mysqld.
# You should try increasing the value of this option if mysqld gives you the error "Too many open files".
open_files_limit=4161

# If you see many sort_merge_passes per second in SHOW GLOBAL STATUS output, you can consider increasing the
# sort_buffer_size value to speed up ORDER BY or GROUP BY operations that cannot be improved with query optimization
# or improved indexing.
sort_buffer_size=256K

# The number of table definitions (from .frm files) that can be stored in the definition cache.
# If you use a large number of tables, you can create a large table definition cache to speed up opening of tables.
# The table definition cache takes less space and does not use file descriptors, unlike the normal table cache.
# The minimum and default values are both 400.
table_definition_cache=1400

# Specify the maximum size of a row-based binary log event, in bytes.
# Rows are grouped into events smaller than this size if possible. The value should be a multiple of 256.
binlog_row_event_max_size=8K

# If the value of this variable is greater than 0, a replication slave synchronizes its master.info file to disk.
# (using fdatasync()) after every sync_master_info events.
sync_master_info=10000

# If the value of this variable is greater than 0, the MySQL server synchronizes its relay log to disk.
# (using fdatasync()) after every sync_relay_log writes to the relay log.
sync_relay_log=10000

# If the value of this variable is greater than 0, a replication slave synchronizes its relay-log.info file to disk.
# (using fdatasync()) after every sync_relay_log_info transactions.
sync_relay_log_info=10000

# Load mysql plugins at start."plugin_x ; plugin_y".
# plugin_load

# MySQL server's plugin configuration.
# loose_mysqlx_port=33060
※3箇所のCOMPUTER_NAMEはあなたのコンピュータ名に変更して下さい。
以上となります。お疲れ様でした。
関連記事

プチモンテ ※この記事を書いた人
 | |
| 💻 ITスキル・経験 サーバー構築からWebアプリケーション開発。IoTをはじめとする電子工作、ロボット、人工知能やスマホ/OSアプリまで分野問わず経験。 画像処理/音声処理/アニメーション、3Dゲーム、会計ソフト、PDF作成/編集、逆アセンブラ、EXE/DLLファイルの書き換えなどのアプリを公開。詳しくは自己紹介へ |
| 🎵 音楽制作 BGMは楽器(音源)さえあれば、何でも制作可能。歌モノは主にロック、バラード、ポップスを制作。歌詞は抒情詩、抒情的な楽曲が多い。楽曲制作は🔰2023年12月中旬 ~ | |
オリジナルゲームをつくってみました✨
Peasant Samurai ~ 百姓ノ持チタル国 (2026/8/3 公開予定)https://store.steampowered.com/app/4880700/Peasant_Samurai/
「民」が主役の幻想戦国RTS/街づくりゲーム