Let’s EncryptでサイトをSSL/TLS(https)に対応する [CentOS]
CentOSに「Certbot」(証明書ボット)をインストールしてLet's Encrypt(レッツ・エンクリプト)の認証局で証明書を発行してhttpのサイトをhttpsにします。WebサーバーはNginxを使用します。※無料SSLです。
証明書は有効期限が90日なので更新の自動化も行います。
1. Certbotのインストール
// インストール
sudo yum install certbot

// インストール場所の確認(/usr/bin/certbotなど)
which certbot
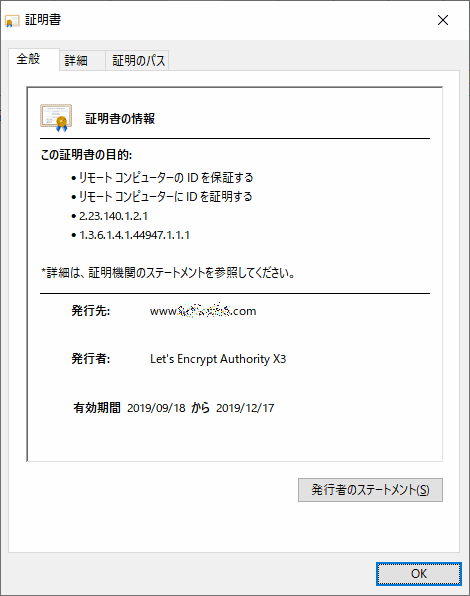
2. 証明書の発行
次例は「www.example.com」に対して証明書を発行します。
sudo certbot certonly --webroot -w /home/ユーザー名/html/www.example.com/ -d www.example.com
| -w | ドキュメントルート |
| -d | ドメイン名 |
2.1 メールアドレスの入力
Saving debug log to /var/log/letsencrypt/letsencrypt.log
Plugins selected: Authenticator webroot, Installer None
Enter email address (used for urgent renewal and security notices) (Enter 'c' to
cancel):
※自動更新が失敗している場合、期限前にメールが届きます。
2.2 規約への同意
- - - - - - - - - - - - - - - - - - - - - - - - - - - - - - - - - - - - - - - -
Please read the Terms of Service at
https://letsencrypt.org/documents/LE-SA-v1.2-November-15-2017.pdf. You must
agree in order to register with the ACME server at
https://acme-v02.api.letsencrypt.org/directory
- - - - - - - - - - - - - - - - - - - - - - - - - - - - - - - - - - - - - - - -
(A)gree/(C)ancel: A
2.3 Let's Encryptパートナーにメールアドレスを公開
- - - - - - - - - - - - - - - - - - - - - - - - - - - - - - - - - - - - - - - -
Would you be willing to share your email address with the Electronic Frontier
Foundation, a founding partner of the Let's Encrypt project and the non-profit
organization that develops Certbot? We'd like to send you email about our work
encrypting the web, EFF news, campaigns, and ways to support digital freedom.
- - - - - - - - - - - - - - - - - - - - - - - - - - - - - - - - - - - - - - - -
(Y)es/(N)o: N
3. Nginxの設定(*.conf)
次の設定では「http://example.com/」にアクセスした場合は「https://www.example.com/」にリダイレクトします。
server {
    listen       80;
    server_name  example.com;
    return       301 https://www.example.com$request_uri;
}

server {
    listen       80;
    server_name  www.example.com;
    return       301 https://www.example.com$request_uri;
}

server {
    listen       443 ssl;
    server_name  www.example.com;

    ssl_certificate            /etc/letsencrypt/live/www.example.com/fullchain.pem;
    ssl_certificate_key        /etc/letsencrypt/live/www.example.com/privkey.pem;

    省略
}
// Nginxのリスタート
sudo systemctl restart nginx
4. 証明書の更新
証明書の有効期限が30日未満の場合のみ実行される。
sudo certbot renew
5. 証明書の一覧
sudo certbot certificates
6. 証明書の削除
sudo certbot revoke --cert-path=/etc/letsencrypt/live/www.example.com/cert.pem
削除後は、Nginxの*.confファイルからSSL設定(443など)を無効にしてNginxをリスタートさせます。
7. 証明書の更新の自動化
CRONジョブが初めての方はCRONジョブでPHPファイルを実行するを参考にして下さい。また、rootでCRONジョブを登録して下さい。
// CRONジョブの設定ファイルをエディタで開く
crontab -e

// 次の1行を書き込む
// 毎朝3:30に証明書の更新を実行する
30 3 * * * certbot renew -q --deploy-hook "systemctl restart nginx"
| renew | サーバー証明書を更新する。(有効期限が30日未満の場合のみ) |
| -q | エラーメッセージのみを出力する。 |
| --deploy-hook | サーバー証明書ごとに実行する。 |
8. 登録メールアドレスの変更
sudo certbot update_account --email メールアドレス
スポンサーリンク
関連記事
公開日:2019年09月18日 最終更新日:2023年07月17日

記事NO:02773
プチモンテ ※この記事を書いた人
 | |
| 💻 ITスキル・経験 サーバー構築からWebアプリケーション開発。IoTをはじめとする電子工作、ロボット、人工知能やスマホ/OSアプリまで分野問わず経験。 画像処理/音声処理/アニメーション、3Dゲーム、会計ソフト、PDF作成/編集、逆アセンブラ、EXE/DLLファイルの書き換えなどのアプリを公開。詳しくは自己紹介へ |
| 🎵 音楽制作 BGMは楽器(音源)さえあれば、何でも制作可能。歌モノは主にロック、バラード、ポップスを制作。歌詞は抒情詩、抒情的な楽曲が多い。楽曲制作は🔰2023年12月中旬 ~ | |